
Let’s be honest. You’re not here for the RGB lights or the motherboard marketing.
You’re here for the forbidden fruit. It’s like tuning a car in your garage, but your garage is your desk. The only smell is ambition.
This practice is about squeezing every last drop of performance from your hardware. It’s a quiet rebellion against planned obsolescence. You might be chasing leaderboard bragging rights, shaving seconds off a video render, or just demanding more from your rig.
For those new to it, CPU overclocking means pushing your processor beyond its factory settings. Modern chips can often deliver a very nice 5-20% boost. That’s the siren song.
But here’s the key part they don’t put on the box. This isn’t magic. It’s applied physics and risk assessment. Knowing just enough to be dangerous is a real thing. You’re entering a dialogue with your components, and it can end with glorious speed or a very expensive paperweight.
So before we dive into the hardware tweaks, let’s ground this in reality. This guide is for the curious beginner. The goal isn’t to break records, but to understand the why, the how, and the very real stakes.
Prepping Your Build
Before we start tweaking settings, there’s important groundwork to do. This is like a pre-flight checklist for your computer. You wouldn’t take off without checking everything, right?
First, think about power. That cheap power supply that came with your case? No way for serious hardware tweaks. You need clean, stable power to avoid problems.
Your power supply should be top-notch. Look for one that can handle at least 150 watts more than your system needs. This extra power is key for stable overclocks.
Next, check your BIOS. Is it up to date? Old BIOS versions can cause issues. Updating can make a big difference.
Unless there’s a security patch issue, get the latest UEFI firmware. It often has important updates and fixes that help your hardware tweaks work.
Now, let’s talk about your tools. Don’t search for “CPU temp monitor” while your system is overheating. Download these tools before you start:
- Stress Testers: Prime95 and RealBench for testing.
- Memory Detective: Memtest86 or Memtest86+ for RAM checks.
- The Dashboard: HWinfo or HWMonitor for monitoring.
- Temperature Readers: Core Temp for Intel, Ryzen Master for AMD.
- The Identifier: CPU-Z to check your settings.
Don’t forget your motherboard manual. It’s your guide to adjusting voltage settings. For more help, check out the CPU overclocking guide and tutorial on Tom’s Hardware.
Also, think about cooling and memory. Is your cooler ready for the extra heat? Are your RAM kits stable? These are key for every voltage increase.
Getting this right makes overclocking safe and rewarding. It’s the difference between being in control and just along for the ride.
Tools & BIOS Settings
Your computer’s BIOS or UEFI is like the control room of a nuclear submarine. It’s all about serious business, flashing with codes, and one wrong move can cause a total system failure. This is where you start your CPU overclocking journey. To get in, press the DEL, F2, or F10 key during startup like you’re trying to break a record.
If your motherboard’s firmware is old, check your manufacturer’s support page (ASUS, ASRock, Gigabyte, MSI) for updates.
Once inside, ignore the chaos. Your first task is to disable power-saving features. Look for C1E, SpeedStep (EIST), and Vanderpool (VT-d) and turn them off. They’re like your system’s accountant, always trying to save energy when you need power.
On the other hand, enable CPU TM Function and Execute Disable Bit. These features help manage heat and security. If you have more than 3GB of RAM, find the “Memory Remap Feature” and turn it on. It makes sure your system uses all the memory you paid for.
Now, it’s time for the main event. Go to the CPU or Tweaker menu. Here, you’ll find the Base Clock (FSB) and the CPU Multiplier. Remember, CPU Speed = Multiplier x FSB. This is where you make your changes.
Before you start with the CPU, set your DRAM (memory) frequency to its rated speed. Trying to overclock both CPU and memory at the same time is like juggling chainsaws on a unicycle—it’s not safe.
The FSB:DRAM divider is a key but often confusing ratio. It shows how your CPU’s base clock relates to your RAM’s speed. Choosing the right one is essential for stability.
| Divider Ratio | Effect | Best For |
|---|---|---|
| 1:1 | Memory runs synchronously with the FSB. Simplest, often most stable. | Beginners, maximizing CPU overclock stability. |
| 4:5 | Memory runs faster than the FSB. Can boost performance. | Experienced users with high-quality RAM. |
| 5:6 | A middle-ground ratio. Offers a mild memory speed boost. | Finding a balance between CPU and RAM performance. |
Start with a 1:1 ratio. It keeps things simple. Your goal is to find a stable starting point. Only after you have a stable CPU overclock should you adjust memory ratios or timings for more performance.
Also, watch the voltage settings. They’re nearby. For now, leave them on auto. Increasing voltage is like adding high-octane fuel to your engine—it can give you more power but also more heat. We’ll deal with that in the next chapter.
GPU vs CPU Approaches
Overclocking a CPU is like a delicate dance in the BIOS. On the other hand, GPU tuning is like a wild party controlled by a software slider. Both aim for better performance, but in different ways. You need to choose your approach wisely, based on the nature of each task.
Overclocking a CPU is a careful, step-by-step process. You adjust settings like multipliers and voltage curves in your motherboard’s firmware. Each change needs a full reboot to test. It’s a careful balance with heat, where a small mistake can cause big problems.
GPU tuning, in contrast, is done in your operating system. Tools like MSI Afterburner let you adjust settings quickly. You can see the results right away. If you push it too far, the system might crash, but you can try again fast.
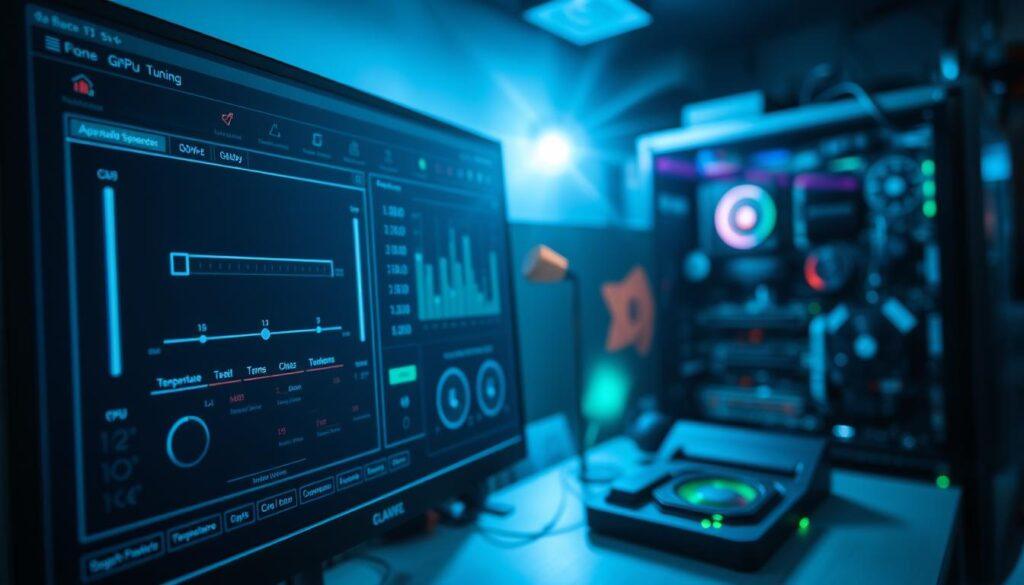
The main idea is the same: more speed means more power and heat. But how you get there is very different. CPU overclocking is like building a foundation. GPU tuning is like fine-tuning a specific tool.
So, which one should you try first? It depends on what’s holding your system back. If your game is already using your graphics card to the max, overclocking your CPU won’t help much. A good GPU tune might make a big difference.
Remember, not all silicon is the same. You can’t treat your CPU and GPU the same way. Knowing which one needs more attention is key. This will help you decide whether to focus on chess-like CPU tuning or quick, reactive GPU tweaks.
Cooling Requirements
The most overlooked factor in overclocking isn’t voltage or BIOS settings—it’s cooling. Performance gains depend on heat dissipation. When you overclock, your CPU generates more heat.
Your stock cooler isn’t made for overclocking. It’s like using a window fan to cool a blast furnace. This is not enough.
The bundled aluminum heatsink with a tiny fan is not enough. It’s like jumping off a roof into a 4-foot pool. It’s not safe for your CPU.
Headroom is key. You need a cooler that can handle more heat than your CPU’s official spec. Look for one rated 30-40% higher than your CPU’s max power.
Official TDP numbers are often too low. They don’t show the real heat generated by overclocking. You need a cooler that can handle more.
There’s no such thing as “too much” cooling. Spending on thermal headroom is essential. A big air cooler or a 240mm+ liquid cooler is not a luxury. It’s necessary for overclocking.
A great cooler is useless without good case airflow. Cool air must enter, and hot air must leave. Good airflow is key for stability.
Don’t forget about other components like VRMs and Northbridge. They can get hot too. Adding a fan to the Northbridge heatsink is a smart move.
Think of cooling as a system, not just a component. The cooler, case airflow, and thermal paste all work together. This strategy keeps your CPU stable and running long.
Monitoring Stability
Stability testing is like your overclock’s final exam. It’s about real data, not guesses. It shows if your system can run for hours without errors.
First, we check the temperature. We use Prime95 to see if your CPU stays cool. If it doesn’t get too hot, you’re good to go.
But, being cool isn’t enough. True stability means passing long tests. We use ASUS Realbench and Prime95’s Blend test for eight hours each. This is the hard part of CPU overclocking.
While these tests run, you watch the data closely. You need to see if temperatures rise or if the voltage drops. Also, check if any core has errors.
For this, I trust HWiNFO. It gives you accurate data on temperatures, voltages, and loads. Forget fancy tools like Asus PC Probe or Intel’s TAT. They’re not as reliable for core temperatures.
Core Temp or HWMonitor are okay, but they use less accurate sensors. HWiNFO gets data directly from the CPU. When you’re overclocking, you need exact data, not guesses.
A system that’s “mostly stable” is actually unstable. Small voltage changes or thermal spikes can cause problems. Successful CPU overclocking means no errors, ever.
The risks are quiet but real. An unstable overclock might not crash right away. It could corrupt files or cause graphical issues. Stability monitoring is about keeping your system safe, one cycle at a time.
Risk Management
The Silicon Lottery isn’t just a joke; it’s the harsh truth of overclocking. You’re pushing your Intel Core i9-14900K or AMD Ryzen 9 7950X beyond its limits. This is more than just a tweak—it’s a new deal with your components.
Let’s be clear: your warranty is gone. Companies like ASUS, MSI, and Gigabyte can spot overclocking damage. They’re protecting themselves from users who ignore voltage limits.
Component wear is a silent threat. It doesn’t always show up with crashes or sparks. A CPU or GPU under too much voltage might seem fine for months before failing. These hardware tweaks cause tiny damage that adds up over time.
The silicon lottery is key. Two chips from the same batch can overclock differently. One might reach 6.1GHz easily, while the other tops out at 5.8GHz. Pushing the weaker chip too hard can be costly.
The aim is to find the highest stable, sustainable performance. This needs careful planning, not reckless risk-taking. Every change should be small and tested thoroughly.
Have you thought about what happens if things go wrong? A failed boot from too much voltage isn’t just an “oops.” It’s part of the process. Knowing how to clear your CMOS is as important as knowing how to change a tire. Always make a system restore point or backup your BIOS before making changes.
| Risk Factor | Likelihood | Severity | Mitigation Strategy |
|---|---|---|---|
| Voltage Overload | Medium | High | Follow architecture-specific voltage guidelines |
| Thermal Throttling | High | Medium | Invest in premium cooling (AIO or custom loop) |
| System Instability | High | Low | Incremental testing with tools like Prime95 |
| Warranty Voidance | Certain | Medium | Accept risk before beginning overclocking |
| Component Degradation | Low (with care) | High | Respect long-term voltage & temperature limits |
Experienced overclockers warn: knowing just enough can be dangerous. The difference between success and disaster often comes down to patience. Did you test for eight hours or eighty? Are you checking temperatures during gaming, not just when idle?
Your backup plan is your safety net. Before pushing for that last 100MHz, save your current settings. Keep a USB drive with your motherboard’s BIOS recovery file ready. These steps turn risk management into a routine.
In the end, safe hardware tweaks follow a simple rule: never push a setting you don’t understand. Voltage isn’t magic—it’s electrical pressure that can either boost or break your system. The silicon lottery sets your limits, but your caution determines your success.
Real-World Performance Gains
Let’s talk about the real benefits of overclocking. It can make your computer run faster and smoother. You might see better gaming, quicker multitasking, and faster apps. The gains can be up to 20% or more.
Imagine a game that runs smoothly instead of stuttering. Or, think about saving seconds on tasks that add up over time. For fans, CPU overclocking means more time and less hassle.
In games, the effect depends on the game type. A 10% overclock might boost frames in Civilization VI but not in Cyberpunk 2077 at 4K. It’s like tuning a car for different tracks.
For work and creating content, the benefits are clear and consistent. A 10% CPU overclocking boost can cut video render times. This is huge for professionals and developers.
The table below shows where overclocking makes a big difference.
| Application Type | Typical Gain | Real-World Impact | Who Benefits Most |
|---|---|---|---|
| Competitive Esports Gaming | 8-15% FPS | Higher frame rates for smoother targeting and reaction. | Esports athletes, high-refresh-rate gamers. |
| AAA Gaming (CPU-Bound) | 5-12% FPS | Improved 1% lows, reducing stutters in complex scenes. | Gamers playing strategy, simulation, or older titles. |
| Video Editing & Rendering | 10-20% Time Saved | Faster export times, quicker preview generation. | Content creators, video professionals. |
| 3D Modeling & Rendering | 7-18% Time Saved | Reduced wait times on complex renders and simulations. | Architects, animators, product designers. |
| Multitasking & Productivity | 5-10% Responsiveness | Snappier feel when running many apps, browsers, VMs. | Streamers, power users, developers. |
GPU tuning is also key. It focuses on graphics performance. Adjusting memory and core clocks can hit 60 FPS at high settings.
Remember, overclocking isn’t about making your computer a hypercar. It’s about fine-tuning for better performance. The thrill is in the efficiency.
For pros, a 10% gain is worth it. For casual gamers, it’s about enjoying a smooth experience. The real gain is in how it feels and the sense of achievement.
Troubleshooting
If your PC suddenly stops working after tweaking, don’t worry. Every overclocker faces challenges. It’s a normal part of the journey.
The real question is not if you’ll hit a snag, but when. How you handle it shows your skill as a tinkerer.
Let’s tackle the worst-case scenario: the system won’t turn on. The screen is black. Don’t panic.
Modern motherboards can often recover on their own. If not, you might need to reset the CMOS.
Look for the clear CMOS jumper on your motherboard. Use a screwdriver to short it for a few seconds. Or, remove the coin-cell battery for thirty seconds. This resets all BIOS settings, including your overclock.
Now, what if your system boots but crashes during stress tests? Finding the cause is like solving a mystery. Start by lowering the clock speed by 50-100 MHz and test again.
If it’s unstable, try increasing the core voltage slightly. But be careful. More voltage means more heat. Keep an eye on temperatures.
Adding voltage can lead to a cycle of instability. Not enough cooling causes throttling. Throttling looks like instability. So, you add voltage, which increases heat. It’s a cycle.
Temperature issues are often the main problem. Check if your CPU or GPU is running too hot. Make sure the cooler is mounted right and the thermal paste is applied.
Don’t forget about case airflow. Are your fans set up for intake and exhaust? These factors are key to stable overclocking.
Intelligent hardware tweaks are essential. Sometimes, the solution isn’t in the BIOS. It’s in your case layout or cooler installation. Approach overclocking with a methodical mindset. Document each change and test thoroughly.
Lastly, remember the “silicon lottery.” Not all chips are the same. Your friend’s CPU might overclock easily, while yours might struggle. It’s not a failure. It’s just physics.
| Symptom | Likely Cause | Immediate Solution |
|---|---|---|
| No POST, Black Screen | Unstable BIOS settings from overclock | Clear CMOS via jumper or battery removal |
| Crashes During Stress Test | Insufficient voltage or excessive frequency | Reduce clock speed, then consider slight voltage increase |
| High Temperatures & Throttling | Inadequate cooling or poor mounting | Re-seat cooler, check paste, improve case airflow |
| Random Instability at Desktop | Marginally stable overclock | Increase voltage slightly or decrease frequency further |
Use this table as your quick-reference guide. When instability strikes, stay calm. Diagnose systematically. The right voltage adjustment or tweak can solve the problem. Remember, every problem has a solution. You just need to find it.
Conclusion
So, what’s the final score on this silicon safari? You didn’t just tweak a slider. You conducted a symphony of electrons.
True CPU overclocking and GPU tuning is a three-act play: patience, precision, and thermal management. It’s like learning how a sports car’s engine works.
You started small. You tested thoroughly. You learned that stability isn’t a suggestion—it’s the law. That lesson, more than any benchmark score, is the real trophy.
The gains are tangible. Extra frames in Cyberpunk 2077. A faster Blender render. But the deeper win is intellectual. You now speak your hardware’s language.
You can diagnose a crash, interpret a voltage curve, and respect a thermal limit. This isn’t a one-time hack. It’s a mindset. Keep your tools handy—HWMonitor, MSI Afterburner, Cinebench. Watch those temperatures like a hawk. Your rig is a living system, not a static appliance.
Whether you pushed an Intel Core i9 to its limit or found the sweet spot on an AMD Ryzen chip, you engaged. You moved from consumer to curator. Now go enjoy that performance boost. You’ve earned every megahertz.