
Imagine the excitement of getting rid of cable clutter and diving into a world of color. It’s like Christmas morning or a late-night gaming session. Your gear comes to life, glowing with vibrant colors.
RGB lighting isn’t just for fun; it’s about making your space feel right. A clean desk can feel cold and sterile. Your brain picks up on this.
Good lighting turns your desk into a command center. It helps you focus and reduces eye strain. Ambient lighting behind your monitor boosts contrast and saves your eyes during long sessions.
Syncing your lights with a single controller makes everything feel connected. It’s like the difference between reading a script and watching a movie in IMAX. The thrill of victory? That’s your brain’s reward for good design.
So, think about what you’re creating. Are you making a tool, or an experience?
Planning Your Color Theme and Zones
Before diving into RGB lighting, think about zoning your setup. The default rainbow wave is like a toddler on a keyboard—too loud and chaotic. Your desk needs a better look. See yourself as the director of your digital world.
Every color sets a mood. Each zone guides your eyes. It’s not just about colors; it’s about telling a story.
After picking your colors, plan your zones. A good source says you need clear areas for control. This turns your space from messy to neat.
| Lighting Zone | Primary Purpose | Recommended Color Palette | Visual Effect |
|---|---|---|---|
| Desk Edge | Framing & Ambiance | Accent Colors (e.g., Cyan, Magenta) | Creates a “floating” look, defines your primary workspace. |
| Under-Desk | Space Definition & Glow | Softer Tones or Match Desk Edge | Illuminates legroom, grounds the entire setup, highlights cable management (or hides sins). |
| Behind Monitor (Bias Lighting) | Eye Comfort & Contrast | Neutral White or Warm/Cool Tones | Reduces eye strain, tricks perception for deeper blacks, is the unsung hero of long sessions. |
| Overall Theme | Cohesive Story | 2-3 Complementary Colors | Ties all zones together, prevents a “disco ball nervous breakdown” aesthetic. |
Think of your desk like a stage. For gaming, use cool blues and reds to boost excitement. For work, warm amber tones help you stay calm. A good plan stops your setup from looking like a mess.
Your desk edge sets the scene. Under-desk lighting shows your space’s size. And bias lighting is key for eye health, making screens clearer.
Don’t go for the rainbow mess. Plan your colors and zones. Your RGB lighting should be a thoughtful experience, not a visual overload. Planning makes all the difference.
Ecosystem Choices: iCUE vs Aura Sync vs Mystic Light vs SignalRGB
The fight for your PC’s lighting isn’t just about hardware. It’s a battle of software, with iCUE, Aura Sync, Mystic Light, and SignalRGB leading the charge. Your choice can make your setup harmonious or chaotic.
Each ecosystem has its own philosophy. Do you want a polished suite or the freedom of open-source? Your hardware might decide first, but knowing the platforms helps you choose.
Corsair iCUE is like a luxury sedan for RGB control. It’s perfect if you have a lot of Corsair gear. The interface is smooth, effects are rich, and integration is seamless. But, it might not work well with non-Corsair devices.
ASUS Aura Sync and MSI Mystic Light are like feudal lords. They control from the motherboard, working with many brands. Their software can be clunky, but it’s compatible with a lot. You get harmony, but it might not be perfect.
SignalRGB is like an open-source collective. It tries to unite all LEDs, supporting many brands. It’s a bold attempt to end the RGB war. It’s complex, but it offers true brand-agnostic lighting.
The dream is a unified dashboard. Imagine OMEN Gaming Hub and HyperX NGENUITY together. One app for everything. Without it, managing your setup is like juggling too many balls.
So, how do you choose? Let’s break it down:
- Pick iCUE if: You’re deep in Corsair’s ecosystem and value polish over universal control.
- Pick Aura Sync/Mystic Light if: Your motherboard is from ASUS or MSI, and you want simple, broad compatibility.
- Pick SignalRGB if: You have a mixed-brand setup and are willing to tinker for ultimate control.
Your hardware is your political party. But if you have a swing state component, choose the software that gives you control with less hassle. Sometimes, the best ecosystem is the one that works well most of the time.
Case, Desk, and Wall Lighting: Strips, Diffusers, Light Bars, Panels
My experience with an L-shaped glass desk taught me a lot. Integrated, diffused lighting makes a big difference. It turns your workspace into a work of art.
The PC case is like the heart, full of fans and lights. But the real magic happens when you light up the whole area.
Case lighting is the base. It’s the soft glow that shows something powerful is inside. It should be subtle, not loud.
Then, there’s your desk. Many setups fail here. They add a cheap RGB strip without thinking. The smart move is to integrate the lighting. This means putting strips in the desk frame or under the glass.
Use channels and diffusers to make the lights smooth. This creates a beautiful, floating effect. It’s a small change that makes a big difference.
Walls are for making statements. Nanoleaf panels are perfect for this. They’re pricey but make a big impact. They’re like RGB tattoos.
Adding vertical light bars next to your monitor adds depth. They’re like spotlights that light up the wall behind your screen. This makes the colors match your mood.
So, what’s the key? Layered illumination.
- Foreground (Desk): Integrated, diffused strips for a soft, encompassing glow.
- Midground (Case): Contained, thematic internal lighting that complements without overwhelming.
- Background (Wall): Architectural elements like Nanoleaf or functional light bars to add dimension and drama.
This is a three-act show for your eyes. When done right, it lights up your space and defines it.
Bias Lighting for Eye Comfort and Perceived Contrast
Bias lighting isn’t just for looks; it’s good for your eyes. It’s like a soft, gentle glow behind your screen. This creates a buffer between the digital world and your dark room.
Here’s the science in simple terms. In a dark room, your monitor is a bright rectangle. Your eyes work hard to adjust to the light, leading to fatigue. A soft backlight helps your eyes relax, making them work less.
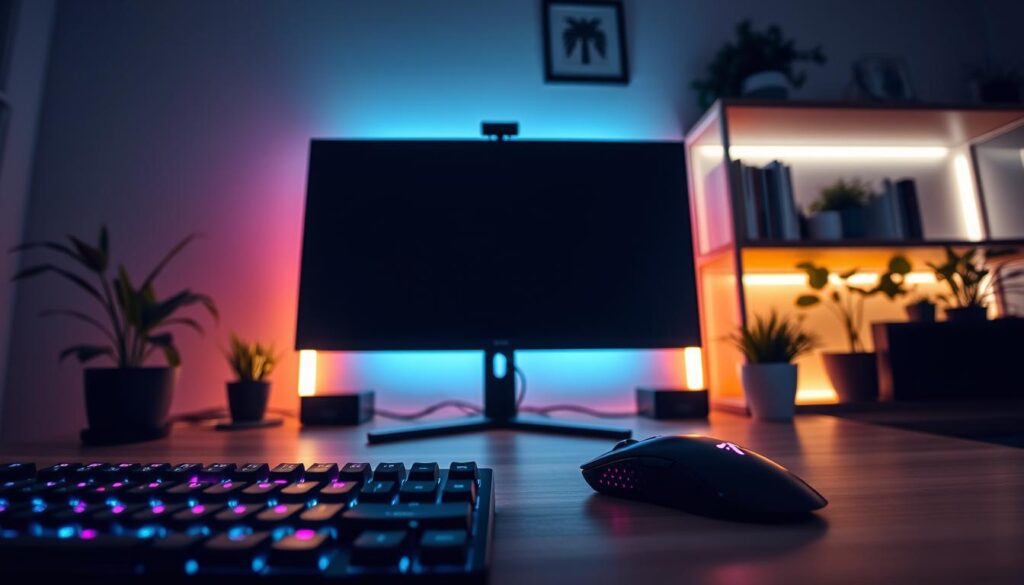
This simple trick has two benefits. It makes your eyes feel better and improves your monitor’s image. The contrast between the screen and its surroundings gets better. This makes colors look more vibrant and blacks deeper.
Setting it up is easy. Use adhesive LED strips on the back of your monitor. Choose a neutral white or low-saturation color. This creates a calm visual space, not a party.
This turns bias lighting into a smart choice for comfort. It’s like looking at a painting in a bright room, not a flashlight. It’s essential for anyone spending long hours in front of a screen.
Syncing Effects with Games and Music
Syncing your RGB lighting with games and music is the ultimate step. It turns you from a fan to a digital master. Static colors are for museums. Our world is dynamic, and so should our lighting.
Imagine your room flashing red when your health drops in a game. Or your desk pulsing with a song. It’s not just decoration; it’s a story told through light.
Software like Corsair iCUE and SignalRGB make this magic happen. They connect to your system’s audio or game APIs. When it works, it’s incredibly immersive.
But, there’s a catch. This magic can be a resource hog. It might make your game distracting or even crash it. Start simple, I advise.
Begin by syncing with your system audio. It’s easy and adds life to your setup. Every beat of music becomes a visual event. Then, try syncing with your favorite games.
Choosing a unified ecosystem helps a lot. A single software suite makes everything work together smoothly. It turns a mess of lights into a single, responsive unit.
| Software | Primary Sync Target | Key Feature | Resource Impact | Best For |
|---|---|---|---|---|
| Corsair iCUE | Games & Audio | Deep hardware integration, extensive game profiles | High | All-Corsair build owners |
| ASUS Aura Sync | Games | Motherboard-level control, wide component support | Medium | ASUS ecosystem users |
| SignalRGB | Audio & Games | Unifies competing brands, massive community effects library | Medium-High | Mixed-brand setups, tinkerers |
| Wallpaper Engine | Audio & Desktop | Links animated wallpapers to RGB, highly customizable | Variable (can be high) | Desktop immersion enthusiasts |
Is the complexity worth it? Absolutely. When your space reacts to your gameplay or music, it’s more than using a computer. It’s a symphony of light and sound. It makes the experience more immersive.
But remember, great power needs great management. Start with one source and perfect it before adding more. Your RGB lighting should enhance your focus, not distract you.
Power Delivery, Hubs, and Headers (ARGB 5V vs 12V)
RGB’s beauty is just skin-deep. Its true power lies in the complex web of headers, hubs, and electrical systems. This part is not fun. It’s where your color dreams meet the harsh laws of physics.
Get it wrong, and your masterpiece turns into a paperweight. But get it right, and the foundation is invisible, just as it should be.
Let’s look at the two main standards. The old guard is the 12V RGB headers, usually 4-pin. It’s like a blunt instrument, sending one color signal to all strips or fans. Every LED must be the same, making it a monologue, not a conversation.
The modern protocol is 5V ARGB (Addressable RGB), a 3-pin connector. It’s like a maestro, controlling each LED individually. This is how you get complex visuals and mesmerizing effects. The “A” in ARGB means each LED can be different, creating stunning visuals.
Remember, these two standards are not interchangeable. Using a 5V ARGB device with a 12V header is a big mistake. It can damage your device and release magic smoke. Always check your motherboard manual and device specs first.
Your motherboard’s headers have limits. A single ARGB header might only support 60 to 100 LEDs. Too many RGB fans, light strips, and coolers can exceed this limit. Symptoms include flicker, dead zones, or failure to light up.
A powered RGB hub is essential. It’s not just an accessory; it’s the heart of your lighting system. It connects to your power supply and talks to your motherboard, saving your headers from damage.
When planning a build with many RGB fans, count your LEDs and check your header’s rating. If you’re near the limit, get a hub. It’s cheaper than a new motherboard. For big ARGB projects, a dedicated controller offers even more control.
Ignoring this electrical groundwork leads to troubleshooting instead of enjoying your build. Do it right, and the wires disappear, leaving only the light.
Cable and Controller Management
Ignoring cable management in an RGB build is like wearing a tuxedo with tags out. You might have stunning RGB lighting, but tangled wires will ruin the look. It’s like a bad movie twist.
People spend a lot on fancy desks but ignore cable management. They should spend 15-20% of their setup budget on cable solutions. This keeps the look clean.
RGB adds a special kind of spaghetti to your setup. You’ll have power, data, and LED strip wires. Start with a deep under-desk cable tray for power bricks and RGB hubs.
Use Velcro straps, not zip ties, for securing cables. They’re easy to change or upgrade. Route your RGB cables with main power and data, using channels or sleeves.
Plan where to put your controller. It shouldn’t look like a forgotten ornament. Give it a proper spot, like the back of the desk or inside the tray. A clean RGB setup looks professional, not like a garage sale find.
Calibrating Color and Brightness for True Whites
Setting all your LEDs to ‘white’ might not give you the perfect look. It’s like expecting a ‘plain’ bagel in New York City. You’ll get a mix of off-whites, like a cool blue from your fan and a warm yellow from your strip. This mismatch is a common problem in the RGB lighting world.
Calibration is the key to solving this issue. It makes your room look designed, not like a tech garage sale. The goal is to match the 6500 Kelvin standard for daylight white. But, it’s not just about setting a preset. True calibration requires manual effort and personal touch.
First, let’s debunk a myth: setting Red, Green, and Blue to 255 doesn’t make a perfect white. This usually results in a cold, bluish light. You’ll need to dial down the blue and nudge up the red and green. Your eyes will tell you what’s right.
Brightness is also important. Your desk strip shouldn’t be too bright, and your monitor’s bias lighting should complement it. Finding the right balance is key for comfort. For more on this, check out how to optimize brightness to reduce eye. The aim is a smooth, even glow.
This guide can help you solve common problems. It translates visual issues into software fixes.
| Symptom | Likely Culprit | Software Adjustment |
|---|---|---|
| Bluish, cold white | Blue LEDs are dominant in the mix. | Reduce Blue value (e.g., from 255 to 240). Slightly increase Red and Green. |
| Yellowish, warm white | Red and Green are overpowering. | Reduce Red and Green values slightly. Ensure Blue is near full intensity. |
| Faint green or magenta tint | One color channel is underperforming. | Use a color picker on a known white image. Match the RGB values in your lighting software. |
| One zone is glaring, another is dim | Uniform brightness setting ignores zone purpose. | Set independent brightness levels per zone (desk: 30%, case accent: 60%, monitor bias: 40%). |
Spending an hour with a color picker and your software’s sliders is a test for the aesthete. It’s tedious, but it’s what turns a collection of bright parts into a cohesive, professional space. In the world of RGB lighting, this attention to detail is a true sign of expertise.
Example Builds by Budget (Entry, Mid, Flagship)
Dreaming is free, but LEDs aren’t. Here’s how to achieve immersive lighting at any financial altitude. Let’s apply the theory to practice, moving from blueprints to three distinct realities. Think of it as a spectrum, from a tasteful accent to a full-blown sensory environment.
This is for the pragmatist. You want personality without a second mortgage. The goal is a focused splash, not domination. Start with a well-placed 3-pack of RGB fans from a reputable brand. Use them as your core case lighting.
Add a single LED strip for subtle under-desk bias lighting. Your command center? Your motherboard’s built-in software—Aura Sync or Mystic Light. You’re managing one, maybe two zones. It’s efficient, cost-effective, and proves you have taste. The result is a clean, focused glow that says, “I care about the details,” without screaming it.
The Mid-Range Build (The Connoisseur)
Now you’re committing. This tier is about choosing an ecosystem and leaning in. Think full suite of iCUE-compatible RGB fans and RAM. You’re investing in a dedicated controller hub for flawless synchronization.
Ambient lighting enters the chat. Consider a Nanoleaf Shapes mini-panel on the wall or a couple of Light Towers. Multiple zones—case, desk, wall—work in concert. You’re unlocking advanced effects and true game integration. The vibe shifts from a PC with lights to a cohesive, reactive battlestation. It’s the sweet spot between ambition and sanity.
The Flagship Build (The Visionary)
Welcome to no-compromise territory. This isn’t a setup; it’s an environment that reacts. Imagine a fully custom water loop with integrated RGB, desk lighting in diffused channels, and wall-to-wall Nanoleaf Canvas panels.
Every device, from every brand, is unified under a single brain—often a dedicated PC running complex profiles via SignalRGB. Your RGB fans are just one instrument in a full orchestra. This is total sensory integration, akin to a “Competitive FPS Setup” mindset applied to aesthetics. The lighting anticipates and responds, creating peak immersion. It’s the final boss of personal illumination.
Your budget is your blueprint. Whether you’re an Apprentice or a Visionary, the principle remains: intentional light beats random sparkle every time. Start with your core RGB fans and build your world from there.
Troubleshooting Flicker, Signal Loss, and Software Conflicts
Fixing your RGB lighting is like solving a mystery. It’s not just about following a guide. A flicker or a dead zone can ruin your mood. Welcome to the world of digital lighting problems.
Flickering lights often mean a power issue. Think of each RGB header as a power outlet. Too many devices on one outlet can cause problems. The lights might dim and stutter.
To fix this, add a powered RGB hub or split your load across multiple headers. Your power supply is good, but those small 5V lines have limits.
Signal loss is a bigger problem. Your software might show a device, but it’s grayed out. Or it might disappear. This is like DLL Hell for LEDs. Software conflicts usually cause these issues.
Running iCUE, Aura Sync, and SignalRGB together can lead to chaos. It’s like having three conductors trying to lead one orchestra. This causes problems.
SignalRGB is often seen as a solution to these conflicts. It can bring together different brands. But, it can also cause issues if it clashes with a device’s native software. The key is to approach it carefully.
Start by installing your main RGB app cleanly. Uninstall other RGB apps for now. Run one app at a time. Also, check for firmware updates on all devices.
Don’t ignore the physical connections. RGB connectors are often flimsy. A flicker might be due to a loose pin. Press all connections firmly until you hear a click. Re-seat every cable. It’s like the IT crowd’s “turn it off and on again” trick.
| Symptom | Likely Cause | Quick Fix |
|---|---|---|
| Random, erratic flickering | Overloaded power header or hub | Redistribute devices to multiple headers; use a powered hub. |
| Device not detected in software | Software conflict or corrupt driver | Perform a clean install of the controlling app (e.g., SignalRGB, iCUE). |
| Colors are out of sync or lagging | Multiple RGB apps running concurrently | Close all background RGB services; use one ecosystem at a time. |
| One LED strip section is dead | Loose physical connector or damaged wire | Firmly re-seat all connectors; check for pin damage. |
This troubleshooting journey is a challenge. It requires patience, a lot of coffee, and a systematic approach. The reward is a stable, beautiful glow. Your setup is not just pretty; it’s also strong.
Safety Tips and Heat Considerations
Before we dive into the colorful world of lighting, a serious note: lighting is an electrical load. Mixing electricity with poor planning can lead to disaster. Your search for the perfect glow should not risk your safety or damage your home.
Electrical safety is key, even if it’s not exciting. LED strips have limits. Never connect more strips than the maker says is safe. Thin wires inside can get too hot and fail if overloaded. Always use the right power adapter or PSU connection. It’s like choosing a safe extension cord over a messy plug setup.
Heat is another important factor. Our data from places like Hong Kong shows that managing heat is vital. RGB fans are fans first. They need to move air. Putting too many LED strips in your case can block airflow and raise temperatures.
Where you place your lights matters. Make sure they don’t block air vents. Don’t put LED strips on hot parts like GPU backplates. Even the LEDs themselves can add up to heat in a crowded setup. Your setup should stay cool, both in temperature and style.
| Common Pitfall | Risk | Best Practice |
|---|---|---|
| Daisy-chaining too many LED strips | Overheating wires, melted insulation, controller failure, fire hazard. | Follow the manufacturer’s chain limit (often 2-4 strips). Use a powered hub for larger setups. |
| Using an under-rated or generic power adapter | Voltage drops, flickering lights, component damage, adapter overheating. | Use only the provided or manufacturer-recommended power supply with correct voltage/amperage. |
| Blocking case vents with light bars or panels | Restricted airflow, higher CPU/GPU temperatures, possible thermal throttling. | Mount lighting next to vents, not over them. Keep air paths clear. |
| Sacrificing fan quality for RGB spectacle on RGB fans | Poor static pressure or airflow, leading to inadequate cooling for your hardware. | Choose RGB fans with proven performance specs (CFM, mmH2O). Aesthetics should complement function. |
| Letting strips contact hot components (GPU, PSU) | Premature LED degradation, adhesive failure causing drooping or shorts. | Route strips away from direct heat sources. Use mounting clips or channels for secure, elevated placement. |
In short, consider every lighting choice carefully. Ask yourself, “Does this look cool?” and “Is it safe and efficient?” A well-managed system is reliable and lets your lights shine for years without trouble.
Future-Proofing and Upgrade Paths
Future-proofing your RGB setup means making it flexible for future changes. Technology advances quickly. What’s new today might be old tomorrow. You want to avoid starting over every time a new trend comes along.
There are three key steps: bet on standards, invest in software, and choose modular parts. Let’s explore each one.
- Bet on Hardware Standards
- Invest in Software Ecosystems
- Think in Modular Components
First, bet on hardware standards. The 5V ARGB (3-pin) header is the best for addressable lighting. Choose fans, strips, and other parts with this connector. It keeps you out of the proprietary trap.
Second, invest in software ecosystems with longevity. The controller is the brain, and the software is its soul. Pick platforms with lots of users and updates. Corsair’s iCUE is a great example. For open options, look at SignalRGB. Your software choice affects how far you can upgrade.
Third, think in modular components. Plan for parts to be replaced, not the whole system. Buy light strips and fans that can be customized. This way, you can upgrade parts without redoing everything.
This approach lets you upgrade easily. You can change parts without redoing the whole system. When new tech comes along, you can just swap out parts, not the whole thing.
The goal is to keep the brains (controller and software) and the parts (hardware) separate. This way, you can upgrade one without messing up the other. Your future self will appreciate it, saving money when new tech arrives. You’ll just need to do a simple swap, not a full rebuild.
Conclusion
Building your RGB battle station is a fun, complex project. It mixes electrical engineering, interior design, and coding. It’s not just about making your webcam bright. It’s about creating a space for gaming, creating, and living.
The right lighting makes your space look amazing. It also helps your eyes and makes games feel more real. You’ve learned about setting up zones, software, and keeping things cool.
Good planning is key, whether for lights or computer performance. The same rules apply, as shown in guides like performance tuning.
Begin with a clear plan and pay attention to the details. Don’t hesitate to make changes. Your dream lighting setup is possible. Now, start building it. Just keep those cables organized.