

Building a giant PC is like using a sledgehammer for a nut. It’s easy to fill a big tower with hardware. But the real challenge is in Small Form Factor.
This isn’t just about saving space on your compact desk. It’s about getting the most performance in the least space. It’s like comparing a Hummer to a Lotus Elise. One uses a lot of space, the other is elegant and efficient.
Products like the UNEVN BASE or Thermaltake CYCLEDESK 100 are more than furniture. They show the importance of being small and efficient. Every part must be justified in a small space.
The joy is in being efficient. You’re not making a big, unnecessary thing. You’re creating a powerful tool that fits well and shows off your smarts.
Case Selection and Thermals
The chassis you pick for your ITX build is more than a home. It’s a place where heat rules. It’s not just shopping; it’s about the laws for your components. The case’s design sets the limits for power and cooling in your SFF setup.
Choosing a case is like picking a philosophy. The Dan Case offers a minimalist, small space with little cooling. On the other hand, the Fractal Design Terra has a more structured layout for better cooling.
The Fractal Design Terra is a top choice for Mini-ITX. It balances looks and size with a smart layout for components. Your choice here shapes your cooling strategy before you even buy a fan.
Do you opt for a chaotic, hope-for-the-best approach? This is like cutting taxes and hoping the market works out. It uses one exhaust fan and lets fresh air in through gaps. But, dust can be a big problem.
Or do you plan a precise airflow system? This is like a planned economy for cooling. You set up specific intakes and exhausts for better airflow over your CPU and GPU. It needs more planning and fans but keeps things cooler.
Looking at popular cases is like analyzing political candidates. Some cases look great but don’t perform well. Others may not look as flashy but keep your system cool.
And then there’s the case that can’t handle a powerful GPU. It looks good but can’t handle the heat. In SFF, your case is key. Pick one that can handle the heat of your system.
CPU/GPU Fitment and Riser Cables
Building a small form factor PC is like playing a game of 3D Tetris. You need to make sure all parts fit perfectly. That top-of-the-line GPU you want might be too big for your elegant case.
Before you buy anything, check the case’s max GPU size. Length is easy to see. But the thickness, or slot count, is the real challenge. A 2.5-slot card in a 2-slot space is a big no-no. This is a rule you can’t ignore.
The PCIe riser cable is your secret weapon. It lets you place your GPU anywhere but on the motherboard. This trick is key to the mini-ITX craze, giving you control over small spaces.
But, not all riser cables are the same. You’ll hear about Gen 3 vs. Gen 4 cables. Gen 4 cables cost more but offer no performance loss for most GPUs. The real issue is if your motherboard works with them.
For tight spaces, 90-degree adapters and low-profile connectors can save the day. They help you close the panel. But, they can also cause signal loss. A straight riser cable from a trusted brand is better than many adapters.
So, measure twice, buy once. Your GPU’s size is key. Plan carefully, and your riser cable will help you succeed, not fail.
SFX/SFX-L PSU Choices and Cable Lengths
Wattage is important, but in small SFF cases, cable management is key. A SFX PSU is like a quiet, efficient worker. It keeps your PC cool without getting in the way.
The SFX and SFX-L are your main choices. The SFX-L is a bit bigger, which can mean a quieter fan. It’s a choice between being super small or having a quieter PC.
Even the best PSU can be bad if the cables are wrong. Standard cables are too long for small cases. They can block airflow and make your PC hot.
Premium SFX power supplies offer more than just efficiency. They come with cables that are easy to manage. These cables are shorter and bend without breaking.
Here’s a comparison of the different PSU sizes. This table shows how each size fits in your case.
| Form Factor | Max Typical Wattage | Key Advantage for SFF | Primary SFF Concern |
|---|---|---|---|
| SFX | 850W | Maximum compatibility with tight cases | Can run louder under load due to smaller fan |
| SFX-L | 1000W | Potential for quieter operation and higher power capacity | May block critical airflow paths or component placement in some layouts |
| ATX (For Reference) | Unlimited | None for SFF; widely available | Simply will not fit in 99% of SFF cases. Don’t even try. |
Do you choose stock cables or custom sleeves? Stock cables are flexible, but custom sleeves look great. They’re made to fit your case perfectly, keeping everything tidy.
Forgetting about cable length is a big mistake. It can make your PC run too hot. Plan your cable routes carefully to avoid this.
Cooling Paths: Top/Side/Bottom Intake Strategies
In an SFF case, every inch of air is a battle. It’s like planning a city on a volcano. Your parts are the buildings, and heat is the lava that could stop everything.
Forget simple fan settings. Good SSF cooling needs a smart plan. You must manage air flow like a small, hot airport.
The bottom intake is a smart move. It brings cool air straight to your GPU. But, if your top fans can’t handle it, the heat goes back in. It’s like adding fuel to the volcano.

Side-mounted radiators are another option. They cool your CPU well but warm the case. It’s a trade-off that might help your CPU but hurt others.
Negative pressure is a strong solution. Make all fans exhaust. The case pulls air in through every opening. It’s messy but works well. It’s like the Mad Max way to cool your system.
Finding the best strategy is hard. It depends on your case, parts, and how much noise you can handle. You need to balance everything like a military commander.
| Airflow Strategy | Primary Intake | Primary Exhaust | Best For | Key Trade-off |
|---|---|---|---|---|
| Bottom-to-Top | Bottom fans | Top & rear fans | GPU-focused builds (e.g., RTX 4090) | Can recycle heat if exhaust is weak; requires strong top fans. |
| Negative Pressure | All passive vents/seams | All case fans | Extremely tight layouts with few fan mounts | Increased dust intake through unfiltered openings. |
| Side Radiator Intake | Side-mounted AIO/radiator | Top & rear fans | CPU-intensive tasks (rendering, simulation) | Warms internal air, potentially raising GPU temperatures. |
| Balanced Positive Pressure | Front/Side fans | Rear fan | Dust-sensitive environments | May struggle with direct GPU cooling in sandwich-style cases. |
Start experimenting with different setups. Test them under stress and check the temperatures. Keep trying until you find what works best for your SSF cooling needs. It’s all about creating the right environment for your system.
Noise and Dust in Tight Spaces
Building a small PC is like playing an orchestra in a small space. Every part must work together to avoid chaos. With everything so close, heat has nowhere to escape, and fans work hard to cool it down.
This setup can sound like a miniature data center instead of a gaming machine. You’re not just looking for cool temperatures. You want it to be quiet too.
Finding the right fan setting is key. It keeps your computer cool without being too loud. It’s a fine line to walk.
The market is listening. When the OMEN 16 Laptop is called the “coolest and quietest,” it meets a real need. We want power without the noise. Achieving this in a small build is both art and science.
Dust is another enemy. All those fans bring in dust from your room. In a small case, dust can harm your computer.
To fight dust, you need a plan. The first step is positive air pressure.
This means using more fans or faster ones to push air into the case. This pressure makes air leave through every opening. It also keeps dust out by not letting air in.
Filters are your next defense. Most small cases have magnetic mesh filters. Use them. If not, you can buy them cheaply.
Where you put filters matters. They should be on intake points like the bottom, side, or front. Remember, filters need cleaning to keep air flowing well.
Let’s look at dust-fighting tools and their downsides. There’s no one-size-fits-all solution.
| Filter Type | Dust Stopping Power | Airflow Restriction | Maintenance Effort |
|---|---|---|---|
| Basic Nylon Mesh | Good for large particles | Low | Low (tap to clean) |
| Magnetic Fine Mesh | Excellent for most dust | Medium | Medium (remove and wash) |
| Foam Panel | Superior for fine dust | High | High (requires washing/drying) |
| Dust Filter Sheets (DIY) | Variable | Variable | High (replace frequently) |
Better filters mean less air flow. You’re back to balancing heat and sound again. A slightly restricted but filtered intake is quieter and cleaner than an unfiltered storm.
Regular maintenance is key. Every few months, take off the panels and clean the fans and heatsinks. It’s a quick job that extends your components’ life and keeps noise down. Dust makes fans work harder and louder.
In the end, managing noise and dust in a small build is about working with its limits. It’s not just building a computer. It’s creating a tiny, self-sustaining world on your desk. Get it right, and all you’ll hear is the joy of high frames per second.
Desk Layout for Airflow and Access
The final piece of the SFF puzzle isn’t inside the case—it’s your desk. Think of it as the launchpad for your compact powerhouse. A poor layout can turn that marvel into a hot, noisy mess.
Burying your case in a cubby or shoving it against a wall is a mistake. It’s like parking a sports car in a garage with the door closed. Your intake fans struggle for air, and the exhaust has nowhere to go. Give your rig room to breathe. A minimum of six inches of clearance on all sides is essential.
Desk size matters. You need a command center, not a postage stamp. The Sharkoon SKILLER SGD10 offers vast space for strategic placement. The Trust GXT 700 Omnius provides a more modest but efficient platform.
Cables are the enemy of every clean build. A spaghetti-junction of wires ruins the aesthetic and blocks airflow. Desks with built-in cable management are your best ally.
Models like the Thermaltake G700 feature dynamic screen glides and hidden channels. The Trust Luminus series has clever routing under the desk surface. These systems let you route cables out of sight and out of the airflow’s way.
Your desk choice directly impacts your SFF experience. It’s the foundation of your thermal strategy and daily access. A good layout means easy access to ports and filters, and a clean space around your PC.
| Desk Model | Dimensions (L x W) | Key Feature for SFF | Cable Management System |
|---|---|---|---|
| Thermaltake G700 | 160 cm x Adjustable | Massive surface, dynamic screen glide for monitor placement | Integrated cable channels and hideaway compartments |
| Trust GXT 700 Omnius | 120 cm x 60 cm | Carbon look, efficient size for smaller rooms | Basic under-desk routing and grommets |
| Sharkoon SKILLER SGD10 | 160 cm x 80 cm | Extremely wide, stable platform for multi-setup | Advanced cable tray and multiple routing grommets |
Before finalizing your SFF build, audit your desk. Is it a partner or an obstacle? The right layout doesn’t just show off your rig—it lets it perform at its best, cool and quiet. After all, what’s the point of winning the battle for internal space if you lose the war on your desktop?
Peripherals for Small Desks: Low-Profile Boards, Wireless Mice
Think of your desk as prime Manhattan real estate—every square inch demands ruthless efficiency. Your glorious small form factor PC conquered the tower, but now the battlefield shifts to the surface. This isn’t just about gear. It’s about peripheral minimalism, the logical extension of the SFF philosophy to your entire control interface.
Let’s start with the command center: the keyboard. A full-sized board on a 120cm desk, like the Trust GXT 700, is a declaration of war against your mouse. That numpad you last used to calculate your 2022 taxes? It’s occupying land that could be a glorious mouse sweep. Enter the compact keyboard revolution.
The 60% keyboard isn’t a hipster affectation here—it’s a strategic necessity. It sheds the numpad, function row, and navigation cluster. What remains is pure typing essence. For many, a 65% layout or a tenkeyless (TKL) board offers the perfect compromise, keeping arrow keys without the sprawl. The choice is a personal Tetris game of functionality versus footprint.
| Keyboard Format | Approx. Width | Key Count | Best For | Key Trade-off |
|---|---|---|---|---|
| 60% | 11.5 inches | 61-68 keys | Max mouse space, pure typists | Lacks dedicated arrows, F-keys |
| 65% | 12.5 inches | 66-68 keys | Gamers needing arrows | Slightly wider than 60% |
| Tenkeyless (TKL) | 14 inches | 87 keys | Users who need F-row regularly | Significantly wider |
| Full-Size | 17+ inches | 104+ keys | Data entry, heavy numpad use | Dominates a compact desk |
Now, for the rodent in the room. A wired mouse on a small desk creates a spaghetti junction of cable management nightmares. Wireless mice, like the advertised Trust GXT 928 Helox, cut the cord clutter crimes. “Ultra-lightweight” isn’t just marketing fluff—it reduces fatigue during long sessions and makes micro-adjustments easier in limited space.
This wireless shift completes the clean look. It’s the final piece for a cohesive minimalist gaming setup that prioritizes function and form. Don’t forget the display. A single ultra-wide monitor often beats a dual setup on a compact desk. One bezel, one power cable, and seamless screen real estate without a physical divide.
The goal is liberation. Liberation from clutter, from unnecessary bulk, from hardware that doesn’t earn its keep. Your small desk shouldn’t feel cramped. It should feel curated. Every device, from your low-profile keyboard to your wireless mouse, should serve a purpose and then get out of the way. That’s the true spirit of the build.
Example SFF Builds (Budget/Mid/Flagship)
Enough with the abstract thermal dynamics. It’s time to build something. Let’s move from theory to practice and blueprint three archetypal small form factor PCs. Each is a lesson in targeted fund allocation and spatial negotiation.
We’ll look at the Budget Contender, the Mid-Range Maestro, and the Flagship Statement. These aren’t just shopping lists. They are philosophies packaged in aluminum and steel.
The Budget Contender: Smart Compromises
This build is a masterclass in value engineering. You start with a sub-$100 case, often something like the Cooler Master Q300L or a used NZXT H210. The goal is maximum performance per dollar, not per liter.
You make smart compromises. GPU length is your primary constraint. You might hunt for a last-gen AMD or NVIDIA card that fits. CPU cooler height is your second big limit. A capable low-profile air cooler is your best friend.
The lesson here? Sacrifice a little volume for a lot of savings. Performance is excellent, but the chase for ultimate density is politely ignored.
The Mid-Range Maestro: The Sweet Spot
This is where the community often settles. The iconic case for this tier is the Cooler Master NR200. It’s the Swiss Army knife of SFF—forgiving, flexible, and wildly popular for good reason.
The NR200 hits a magic triangle. It supports large GPUs, decent air coolers or even 240mm radiators, and remains relatively compact. You can run a Ryzen 7 or Core i5 with a high-end GPU without thermal panic.
This build is about balance. You get nearly flagship-level components without the flagship-level financial shenanigans or cooling headaches. It’s the rational choice for the enthusiast.
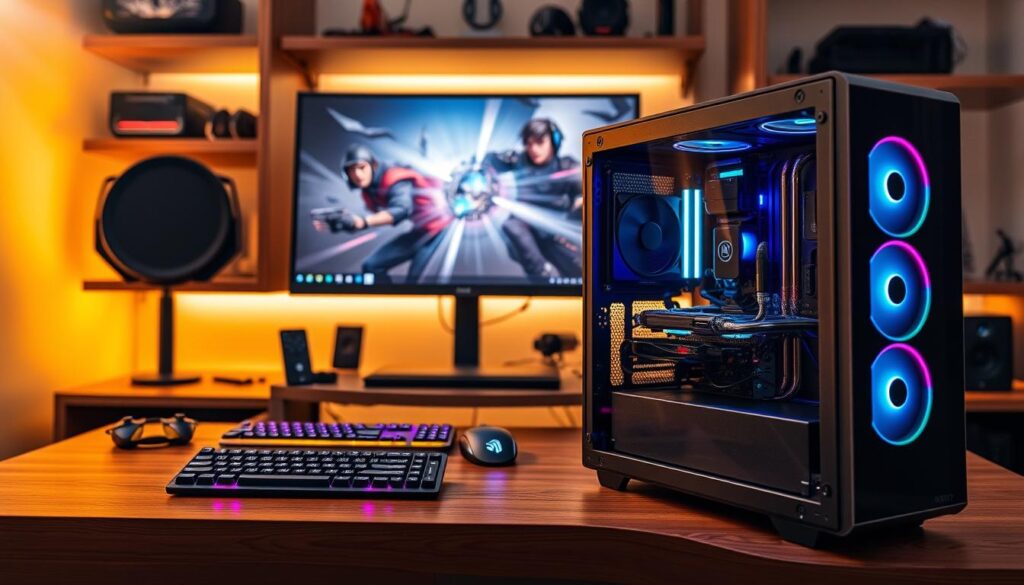
Here, budget is a suggestion, and density is king. We’re talking cases like the Dan Case A4-SFX or the FormD T1. These are sub-10-liter marvels of engineering that demand equally meticulous components.
Every part is selected for its power-to-size ratio. You’re using an SFX-L power supply, a custom-length cabling kit, and a GPU that’s been surgically selected for its dimensions. Cooling becomes a precision art, often involving high-end low-profile coolers or exotic custom loops.
This tier also includes boutique showpieces. Think the elegant Fractal Design Terra or a pre-built concept like the UNEVN BASE. The goal isn’t just performance. It’s a statement of technical and aesthetic ambition.
The Dan Case and its peers teach a final lesson. When volume is the ultimate constraint, every millimeter and dollar must be spent with purpose.
| Build Type | Case Example | CPU/GPU Philosophy | Cooling Focus | Estimated Cost Range |
|---|---|---|---|---|
| Budget Contender | Cooler Master Q300L | Last-gen high-value parts, strict fitment rules | Efficient low-profile air; positive pressure for dust | $800 – $1,200 |
| Mid-Range Maestro | Cooler Master NR200 | Current-gen mid/high-tier; near-full component support | Robust air cooling or 240mm AIO; great airflow | $1,400 – $2,000 |
| Flagship Statement | Dan Case A4-SFX / FormD T1 | Top-tier components chosen for extreme density | Precision low-profile air or custom water loop | $2,500+ |
So, which archetype speaks to you? The budget builder proves SFF is accessible. The mid-range maestro offers a nearly perfect balance. The flagship statement pushes the boundaries of what’s possible in a tiny box. Your budget and your tolerance for puzzle-solving will decide.
Temperature and Noise Benchmarks
Understanding thermal data for small PCs is like reading a medical chart. You need context. Numbers like 78°C and 42 dBA mean nothing without knowing the background. In the SFF world, “good” thermals mean keeping CPU and GPU boost clocks high under heavy loads. This is what performance per liter is all about.
When it comes to benchmarks, controlling your environment is key. Testing in a 72°F room versus an 80°F room can change your results. Always note your room temperature. Also, know the load. Synthetic tests like FurMark or Prime95 are like a treadmill set to “mountain mode.” They help find the thermal limit.
But real-world gaming is different. It’s a variable load. This is where your cooling strategy really shows its worth. A build that survives synthetic tests might sound like a hairdryer playing Cyberpunk 2077. You need to measure both noise and temperature.
Noise is subjective. The objective measure is decibels, measured at a standard distance. But the real test is: “Can I hear it over my game, music, or existential dread?” A low hum might be okay. But a high-pitched whine will drive you mad, even at a lower decibel level. A good SFF build aims for a tolerable sound level, not silence.
So, what are “good” numbers? It varies based on your components and case. The table below shows what to expect from a modern, mid-range SFF build compared to a standard ATX tower. It highlights the SFF trade-off.
| Scenario | Metric | Typical SFF Result | Typical ATX Tower Result | Interpretation |
|---|---|---|---|---|
| Gaming Load (CPU+GPU) | CPU Temperature | 70-85°C | 60-75°C | SFF runs warmer but is fine if clocks are sustained. |
| Gaming Load (CPU+GPU) | GPU Temperature | 75-80°C | 65-72°C | Similar story. Modern GPUs are designed for this. |
| Idle / Desktop Use | System Noise | 30-35 dBA | 25-30 dBA | SFF may have a faint, constant fan presence. |
| Intensive Gaming | System Noise | 40-48 dBA | 35-42 dBA | SFF is often louder. The question is: is the tone annoying? |
| Synthetic Stress Test | Thermal Throttling | May occur on hottest cores | Rarely occurs | This is the SFF thermal limit. Real gaming usually doesn’t hit this. |
See the pattern? ATX towers win on numbers. But SFF systems, while warmer and louder, should deliver full performance in games. If your GPU holds a 2500 MHz boost clock at 78°C, celebrate. But if it drops to 1800 MHz at 85°C, you have a problem.
This is where we separate marketing hype from engineering reality. A case reviewer might panic over an 83°C CPU temperature. But an experienced SFF builder checks the clock speed, smiles, and turns up the volume. Benchmarks are tools for diagnosis, not just comparison.
Travel and LAN Considerations
The UNEVN BASE is more than a computer; it’s a symbol of portable setup freedom. It shows that small doesn’t mean you can’t be free.
Do you want a setup for LAN parties or for traveling? Your choice affects everything.
The UNEVN BASE is a complete system. It folds up for easy transport. For DIY fans, we need to piece together our own systems.
Start with a case that has a handle. It’s important for carrying your gear. A heavy graphics card can damage your setup while traveling.
Consider your cooling options. An air cooler or an AIO liquid cooler might be better for travel. The choice might surprise you.
| Travel Scenario | Case Priority | Cooling Pick | Must-Have Accessory |
|---|---|---|---|
| LAN Party Luggable | Handle & Light Weight | Low-Profile Air Cooler | GPU Anti-Sag Bracket |
| Business Travel | Ultra-Compact Size | Efficient Air Cooler | Padded Carry Bag |
| Cross-Country Road Trip | Robust Construction | AIO (Pump Safety) | Internal Component Braces |
| Permanent Relocation | Standard Protection | Either (Drained First) | Original Packaging |
Air coolers are simpler. They don’t have pumps or liquids to worry about. But, big tower coolers can stress your motherboard.
AIOs have pumps and liquids. But, a sealed unit is fine during travel. The risk is the radiator’s weight.
Make your setup ruggedized and small. Use short cables and add padding. Choose a power supply that’s quiet.
Your portable setup shows you value freedom. It’s about performance on the go. Whether inspired by the UNEVN BASE or DIY, build for the journey.
Upgrade Constraints and Future GPUs
In the world of SFF, your case is more than a home for your parts. It’s a long-term deal with strict rules. The shiny GPU you get today might need more space tomorrow.
GPU makers are racing to make bigger, hotter cards. Your case is the key to letting them in.
Clearance is your top priority. It’s not just about length. You need to think in three dimensions.
Length is the first thing to check. Will a 340mm card fit? What about the 360mm card coming next year?
Thickness is sneaky. A 2.5-slot card today might become a 3.5-slot card tomorrow. That extra centimeter can be a big deal.
Height is the wild card. Tall cards and connectors can hit the roof or case frame. It’s all about millimeters.
So, what’s the best strategy? The safest bet is to leave yourself some headroom. Choose a case with lots of room. It’s not exciting now, but it will be later.
This is like planned obsolescence for DIY fans. Your build today might not be upgradeable in 24 months. Ask if your case is a forever home or just a temporary stay. Sometimes, the best build is the one that makes room for the next one.
Common Pitfalls and Fixes
Welcome to the support group. We all know the feeling of installing the motherboard before the I/O shield. Every builder of a compact powerhouse has a horror story. These tales bind us, showing the precision and patience needed in this hobby.
Let’s look at the most common mistakes. And let’s give you the fixes, elegant or forceful. Think of this as your backup plan.
The Clearance Catastrophe
You bought low-profile RAM, checked the specs, but it’s too tall. Or your CPU cooler hits the side panel, causing thermal issues.
This mistake is common in SFF builds. The fix often requires research and sometimes a bit of force.
- For RAM: If it’s just a millimeter, aftermarket low-profile heat sinks exist. Running the modules without their fancy tops is a valid, if ugly, solution. Your goal is airflow, not looks.
- For Coolers: Check for a compatible slim fan replacement. Sometimes, a slight repositioning or a gentle persuasion with a non-marring tool can help. Always power on and check temps before sealing the case.
The Pre-Installation Amnesia
In the excitement of a new build, sequence matters. Forgetting the I/O shield until the motherboard is in is common. So is finding a rogue standoff causing a short, preventing the system from posting.
The fixes here are about following the right steps, not about parts.
- I/O Shield First: Make it a mantra. Install the shield into the empty case. Then put in the board. If you forget, you’ll likely need to remove the motherboard, undoing half your work.
- Standoff Audit: Before placing the motherboard, match every hole on the board to a standoff in the case. An extra standoff is a silent killer. Use a magnetic tip screwdriver to remove it.
The Cable Management Debacle
You’ve crammed all the cables in. The system boots! But then you notice the GPU temperature is 15 degrees higher than expected. A single SATA cable has blocked a critical intake fan, strangling airflow.
- Plan the Path: Before tightening anything, run cables loosely to find the best route. Use the case’s channels and tie-down points.
- Short Custom Cables: If stock cables are too long and bulky, custom-sleeved cables cut to exact length are a game-changer. They turn a nest of wires into a manageable system.
- The Power Button Cable: If it’s too short, a simple extension cable is a cheap and effective fix. Don’t stretch it; you’ll risk a poor connection.
These pitfalls are not failures. They are data points. Each solved problem, whether with a precise tool or a frustrated sigh, makes you a better builder. The true mark of an SFF veteran isn’t a flawless first build. It’s a toolbox full of clever fixes for the mistakes they’re no longer afraid to make.
Conclusion
The final question isn’t about cubic centimeters or decibels. It’s about temperament. Building a small form factor PC is a test of your personality, hidden in a hardware project.
This journey through case selection, thermal labyrinths, and cable origami shows SFF building is not for the impatient. It needs the detail of a watchmaker and the determination of a systems engineer. Your reward is a powerful machine that fits in the space of a small toaster.
You choose to avoid the usual tower size for a statement of technical skill. Your SFF build becomes a piece of functional art on your desk. It talks about upgrade limits and LAN portability.
In a world of big software and hardware, making a small form factor PC is a bold statement. You’re not just putting parts together. You’re mastering a craft.