

Building a top-notch gaming PC in 2025 is more than just buying the latest parts. It’s about planning carefully. New tech like CPU and GPU changes the game. But first, let’s figure out what you really need.
Knowing your gaming goals is key. For example, a budget of £600 to £900 can handle 1080p games well. For 1440p, you’ll need to spend around £1,000 to £1,500. And for 4K, get ready to spend £1,600 to £2,500+.
It’s easy to get caught up in fancy specs. But smart builders spend wisely. They allocate 40-50% for the GPU, 15-20% for the CPU, and the rest for other parts. Choosing tech like DDR5 and PCIe 5.0 helps your system grow with new tech.
CPU Selection: Intel 14th Gen vs AMD Ryzen 7000/8000 Series Performance Analysis
The debate between Intel’s 14th Gen and AMD’s Ryzen 7000/8000 series is intense. Both have made big strides, but which one should you choose in 2025?
AMD’s Zen 5 architecture brings excitement with its Ryzen 7 and 9 chips. These processors have 8 to 16 cores and integrated Ryzen AI engines. This means you can do tasks like real-time voice translation right on your device. It’s great for those who want to keep their data safe and local.
Intel responds with its 14th Gen Raptor Lake refresh and the new 15th Gen Arrow Lake architecture. Arrow Lake introduces Lion Cove performance cores and Skymont efficiency cores. But, you’ll need a new LGA1851 socket, making your Z790 motherboard outdated.
AMD’s AM5 socket is a game-changer. It supports DDR5 and PCIe 5.0 and works with coolers from the AM4 generation. This means you can update your BIOS without spending a lot of money.
For gamers, AMD’s 3D V-Cache CPUs are the surprise winners. They excel in CPU-limited scenarios. Intel’s high-clock i7 and i9 processors, on the other hand, lead in single-threaded performance, which is key for many games.
Here’s a quick comparison to help you decide:
| Feature | AMD Ryzen 7000/8000 Series | Intel 14th Gen/15th Gen |
|---|---|---|
| Cores | 8-16 | Up to 24 (with P-cores and E-cores) |
| Socket Type | AM5 | LGA1851 |
| Integrated AI Engine | Yes | No |
| Platform Longevity | High (BIOS updates) | Medium (new socket required) |
In conclusion, AMD’s AM5 ecosystem is the better choice for longevity and easy future upgrades. But, if you need top single-core performance now and don’t mind a new socket later, Intel’s Arrow Lake might be for you. Remember, in 2025, aim for at least 8 cores and 16 threads for gaming.
GPU Deep Dive: RTX 4090, 4080, 4070 Ti vs RX 7900 XTX Benchmarks and Value
In the world of high-performance gaming PCs, the GPU is key. Today, we’re looking at the top GPUs. The Nvidia RTX 4090 is a powerhouse, with performance that’s almost unbelievable.
The RTX 4080 and 4070 Ti also offer great performance. They’re perfect for those who want to play games without spending too much.
The RTX 4090 has 24GB of GDDR6X memory and uses a lot of power. It’s ideal for 4K gaming, handling tough games with ease. The RTX 4080 and 4070 Ti are more affordable, but they also deliver great performance.
AMD’s RX 7900 XTX is worth mentioning too. It has 24GB of VRAM and competes with Nvidia’s prices. It performs well in rasterization, making it a strong competitor.
The RTX cards have an advantage in ray tracing, thanks to DLSS 3. But AMD’s FSR 4 and AI upscaling are closing the gap. The RX 7900 XTX is a cost-effective option for high-performance gaming.
If you want the best, the RTX 4090 is your top choice. But for a balance of performance and price, the RX 7900 XTX is a good option. Remember, in 2025, at least 16GB of VRAM will be essential for gaming.
Motherboard Matrix: Z790, B650E, X670E Feature Comparison and Overclocking
The motherboard is key to your custom gaming computer. It’s often overlooked, but it’s vital for performance and stability. In 2025, the motherboard market has changed a lot. You’ll need a sharp eye and maybe a drink to navigate it.
AMD’s AM5 platform has the X670E as its top model. It supports PCIe 5.0 for both your GPU and M.2 slots. The B650E is more affordable, with PCIe 5.0 where it matters most. The ASUS ROG Strix B650E-F is great for those who want performance without the high cost.
Intel’s Z790 chipset is a strong choice for 12th to 14th Gen chips. The MSI MAG Z790 Tomahawk has a mature BIOS and great memory overclocking. The new Z890 boards will have even more PCIe 5.0 lanes, perfect for future upgrades.
In 2025, overclocking is about managing heat and luck. Both X670E and Z790/Z890 boards have powerful VRMs. Your CPU cooler will likely be the bottleneck, not the motherboard.
For a custom gaming computer build, focus on these features:
- Sufficient USB ports for all your peripherals
- At least two M.2 slots (one PCIe 5.0 for future-proofing, one PCIe 4.0 for your game library)
- BIOS flashback capability to avoid those Saturday night headaches caused by corrupted updates
Mini-ITX builders, rejoice! The small boards of 2025 have powerful VRMs, but they’re pricey. Remember, your socket choice affects future upgrades.
| Motherboard Model | Chipset | PCIe Support | VRM Quality | Best For |
|---|---|---|---|---|
| ASUS ROG Strix B650E-F | B650E | PCIe 5.0 | High | Overclockers |
| MSI MAG Z790 Tomahawk | Z790 | PCIe 5.0 | High | 12th-14th Gen Intel |
| Gigabyte X670E AORUS Master | X670E | PCIe 5.0 | Premium | High-end Builds |
Choosing a motherboard is like picking a partner for life. You want stability, performance, and growth. For more tips on your gaming setup, check out this guide.
Memory Mastery: DDR5 Speed Sweet Spots, Capacity Requirements, and Latency Impact
In the world of gaming, memory is key, not just an accessory. The move to DDR5 has boosted gaming PC performance in 2025. For top gaming, aim for 32GB of DDR5, but 64GB is best for future-proofing.
What’s the ideal speed? It’s DDR5-6000 CL30. This mix of speed and stability works well for both AMD and Intel systems. AMD, in particular, does well at 6000 MT/s thanks to its Infinity Fabric.
Going past 6400 MT/s doesn’t always improve gaming. While kits can hit 8000 MT/s, the difference in frames is small. You might as well spend that money on new games!
Latency is also key. A DDR5-5600 kit with CL28 timings beats a DDR5-6400 CL36 kit in games. Games care more about quick memory response than just speed.
Don’t forget to turn on EXPO or XMP in your BIOS. Many builds run at JEDEC 4800 MT/s because of this. Don’t be that person!
DDR4 is now outdated, like vinyl records. And DDR6 is coming, but not yet. For now, choose good DDR5 for the best performance.
| Memory Type | Speed (MT/s) | Latency (CL) | Recommended Capacity |
|---|---|---|---|
| DDR5-5600 | 5600 | 28 | 32GB |
| DDR5-6000 | 6000 | 30 | 32GB |
| DDR5-6400 | 6400 | 36 | 64GB |
| DDR5-7200 | 7200 | 38 | 64GB |
Storage Strategy: PCIe 5.0 NVMe vs PCIe 4.0, Capacity Tiers, and Game Loading Performance
Building a gaming PC is all about the storage debate. In 2025, choosing between PCIe 4.0 and PCIe 5.0 NVMe drives is key. PCIe 4.0 drives, like the Samsung 990 Pro, offer speeds of 7,000-7,500 MB/s. But PCIe 5.0 drives can go up to 10,000-12,000+ MB/s. They get very hot, so you might need cooling solutions or big heatsinks.
The upgrade to Gen5 isn’t as big as you might think. It’s like comparing a fine wine to a great soda. Both are good, but they’re different. Microsoft DirectStorage is the real game-changer. It lets games stream assets directly to the GPU, making games load faster and look smoother.
So, what’s best for your gaming PC? A minimum of 1TB NVMe SSD is recommended. 2TB is better for big game libraries. A dual-drive setup, like a 500GB or 1TB PCIe 4.0 for your OS and apps, and a 2TB PCIe 4.0 or 5.0 for games, is ideal.
But watch out for Gen5 heat! If your motherboard doesn’t have a good M.2 heatsink, you might need a cooling solution. Hard disk drives (HDDs) are mainly for NAS units and data hoarders in 2025. They’re not for a primary gaming PC unless you’re archiving a huge media library.
In short, high-speed storage is tempting, but it might not be worth it for everyone. What’s important is a solid strategy that prepares you for the future of gaming.
Cooling Solutions: AIO vs Air Cooling, Thermal Performance, and Noise Optimization
The world of cooling in 2025 is all about finding the right mix of looks, performance, and ease. With PC components in 2025 getting hotter, picking the best cooling method is key. Intel’s i9 chips and AMD’s 16-core Ryzen 9 processors are leading the heat.
The Noctua NH-D15 is a top choice for air cooling. It’s a dual-tower cooler that’s as quiet as it is effective. It’s like the Toyota Land Cruiser of coolers: strong, a bit big, and built to last.
The Corsair iCUE H150i Elite is the best of AIO liquid cooling. It’s a 360mm cooler that keeps things cool and looks great. It’s a big step up from older AIOs, with designs that are reliable and look good.
If you’re keeping your old cooler, AMD’s AM5 socket is compatible with AM4 coolers. But, Intel’s LGA1851 needs new mounting hardware. This is something to think about if you’re switching to a new platform.
Don’t forget about noise when choosing a cooler. Sometimes, more fans running slower can be quieter than a few fans going full speed. A well-ventilated case with 140mm fans at 800-1000 RPM can keep your gaming quiet, even with powerful hardware.
| Cooling Type | Performance | Noise Level | Installation Complexity |
|---|---|---|---|
| Air Cooling (Noctua NH-D15) | High | Low | Moderate |
| AIO Cooling (Corsair iCUE H150i Elite) | Very High | Moderate | High |
| Custom Loop | Extreme | Variable | Very High |
In conclusion, whether you choose AIO or air cooling, it should match your build and your style. The future of cooling is about more than just keeping things cool. It’s about creating an experience that fits your gaming and style goals.
Power Supply Calculations: 80+ Efficiency Ratings, Modular vs Non-Modular, Wattage Requirements
The power supply is key for high-performance gaming PCs. It’s not just a box that plugs in. It’s essential for a great gaming experience.
Wattage is a big deal. In 2025, figuring out power needs is complex. The RTX 4090 can use up to 450W, and the RTX 5090 might need 600W. That’s as much as a microwave!
To find out what you need, follow this formula:
- Calculate your CPU and GPU’s maximum draw.
- Add 150W for the motherboard, RAM, storage, and fans.
- Multiply by 1.3 for extra power.
For example, a 4090 with an i9 or Ryzen 9 needs about 1000W. But, a 850W is enough for a 4080 or 7900 XTX. A 650W works for mid-range builds.
The 80+ efficiency ratings matter too. They show how well your power supply uses electricity. Gold is a good choice for most. Platinum and Titanium are for saving money or enjoying luxury.
Modular vs. non-modular power supplies also matter. Modular PSUs make cable management easier. Semi-modular options are a middle ground.
Don’t cut corners on your PSU. A bad PSU can ruin your whole system. Choose brands like Seasonic, Corsair, EVGA, and be quiet!. Your gaming PC will appreciate it.
Case Selection: Airflow Design, RGB Integration, and Cable Management Features
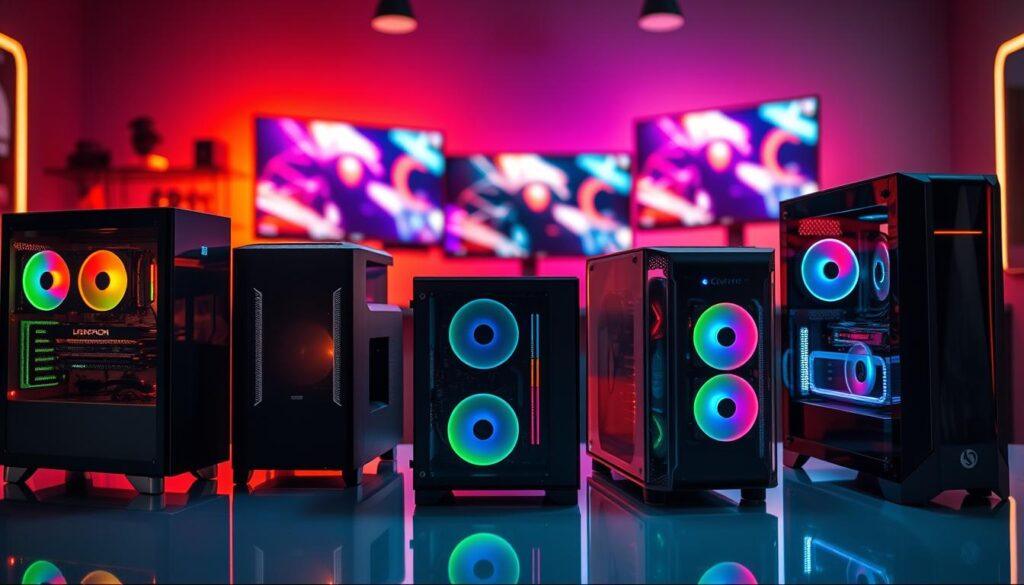
Choosing the right case for your custom gaming computer is like picking the perfect outfit for a first date. It needs to look good and work well. With high-TDP components becoming more common, good airflow is key. A well-ventilated case keeps your components cool, even when they’re working hard.
Here are some top cases to consider:
- Corsair 4000D Airflow: Great for budget builds, this case has a mesh front panel for better airflow. It’s easy to assemble, making it perfect for beginners.
- Lian Li PC-O11 Dynamic: If you want something fancy, this case is it. It has a dual-chamber design that hides cables and shows off your components. It’s a real showstopper!
RGB integration is also important. It’s not just about how many lights you can fit in a case. A case with addressable RGB fans that sync with your motherboard’s software looks amazing. But, proprietary RGB systems can be a hassle.
Don’t forget about cable management. Look for:
- Rubber grommets to prevent cable wear.
- Velcro tie-down points for neat organization.
- Adequate clearance behind the motherboard tray for easy routing.
For 2025’s powerful components, airflow is more than just looks. It’s essential for keeping your system cool. Choose cases with mesh front panels and smart exhausts to keep your system running smoothly.
In short, your custom gaming computer case should have good airflow, look great, and manage cables well. This ensures your system runs efficiently and looks amazing. Make a smart choice!
Assembly Process: Step-by-Step Build Guide with Pro Tips and Troubleshooting
Are you ready to make your gaming dreams come true? Let’s start the assembly process. Building a gaming rig is where theory meets reality. It’s exciting but can also be a bit scary if you’re doing it for the first time.
Don’t worry! I’m here to guide you through each step carefully.
Step 1: CPU Installation
Begin by aligning the CPU’s triangle with the motherboard’s triangle. This is key to avoiding a costly mistake. Lower the CPU straight down without moving it sideways. If it doesn’t fit, you’ve got it wrong.
For thermal paste, use a small pea-sized dot in the center. Forget the “spread method”; it’s not needed.
Step 2: RAM and SSD Installation
Next, install your RAM and SSD on the motherboard before putting it in the case. Listen for the click when the RAM is in place. For M.2 SSDs, insert them at a 30-degree angle and secure with a tiny screw.
Step 3: Motherboard Standoffs
Now, let’s talk about standoffs. These brass spacers keep your motherboard from touching the case. Make sure every hole on your board has a standoff. No standoffs where there’s no hole; it’s a simple rule but very important.
Step 4: GPU Installation
Modern GPUs are big and need careful installation. Use support brackets to prevent damage to your motherboard. Connect separate PCIe power cables for each GPU connector. Avoid daisy-chaining cables; it’s a recipe for disaster.
Step 5: Cable Management
Good cable management is not just for looks; it’s for airflow too. Route cables through the nearest grommet and bundle excess behind the motherboard tray. Use Velcro ties instead of zip ties; they’re easier to adjust later.
Step 6: First Boot and BIOS Setup
It’s time for the moment of truth. Turn on your rig and enter the BIOS. Enable XMP or EXPO for your RAM, set fan curves, and check all drives are detected. If it doesn’t post, check the basics first—power switch on the PSU, 24-pin motherboard connection, and CPU power connector. Troubleshooting can save you from despair.
| Step | Action | Pro Tip |
|---|---|---|
| 1 | Install CPU | Align triangles; no force needed. |
| 2 | Install RAM & SSD | Listen for the click! |
| 3 | Install Standoffs | Check for holes and match standoffs. |
| 4 | Install GPU | Use support brackets for stability. |
| 5 | Cable Management | Velcro ties are your best friend. |
For a more detailed guide on building a PC, check out this step-by-step resource. With these steps, you’re on your way to building a powerful gaming rig!
Performance Testing: Benchmark Suite and Optimization Settings for Maximum FPS
It’s time to test your gaming PC build. All your component choices will be put to the test. You want your RTX 4090 to perform at its best, without any bottlenecks.
Begin with a good benchmark suite. Cinebench R24 is great for checking your CPU. It tests all cores and compares your score to others. If your score is 5-10% lower, you might need to adjust some settings.
For GPU tests, use 3DMark Time Spy and Port Royal. They compare your graphics card’s performance. Also, run Heaven Benchmark and Superposition for thermal tests. Use HWInfo64 to check temperatures and find any issues.
Optimization is key for gamers. Install Windows 11 for gaming optimizations. Update your GPU drivers with NVIDIA GeForce Experience or AMD Adrenalin. Enable Game Mode in Windows Settings for better performance. You can also try undervolting or overclocking with MSI Afterburner.
Don’t just rely on synthetic benchmarks. Play the games you love. Cyberpunk 2077 and Microsoft Flight Simulator will test your system. Keep track of your results to see if performance changes.