
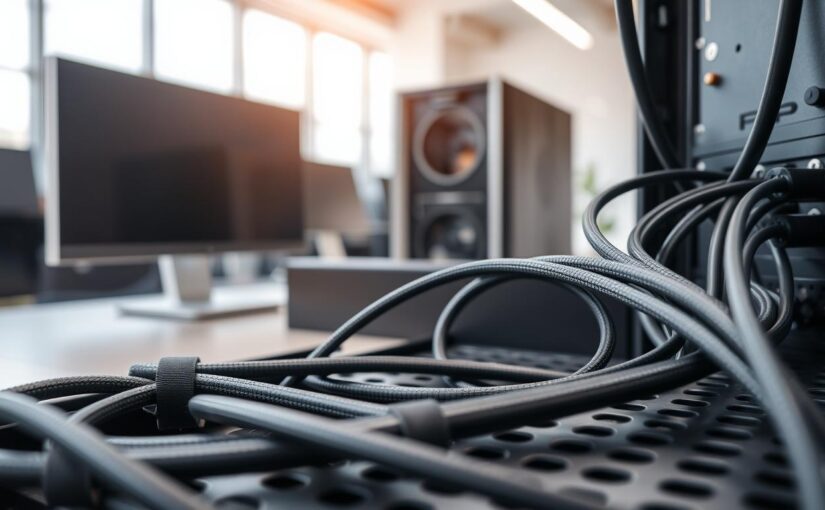
That mess of wires behind your monitor isn’t just an eyesore; it’s a disaster for airflow. I’ve seen more problems caused by tangled USB cords than bad computer cases.
This isn’t just about looking good. It’s about applied physics and how your workspace feels. When cables are organized, air can flow better. This keeps your computer parts from overheating.
A clean desk isn’t just about looks. Clutter makes your mind work harder. A tidy space helps you think clearer. It’s like Feng Shui for work.
We’re moving away from ignoring our cables. We want intentionally routed, optimally performing systems. Your computer stays cool, and you stay focused. That’s a win-win.
Mapping Power and Data Paths
Before you start, you need to map out your digital space. It’s not just tidying up; it’s a strategic mission. Think of your desk as a city you’re designing from scratch. Each device is a district, and cables are like vital roads.
Start by tracing every cable from its source to its end. Find out where each USB cable goes and which power brick is left out. This step uncovers the story of your setup’s daily mess.
Soon, you’ll find the main trouble spots. For most, these are the areas behind the tower and under the desk. If ignored, they become messes of tangled cords. Our goal is to turn these spots into organized paths.
Grommets are key to this. They’re not just holes; they’re special paths. Use them to create clear paths for data and power cables. This keeps your setup tidy and organized.
Plan for the future. Is that USB-C port for a webcam? Leave room for it. Will you need a bigger monitor? Make sure the cable channel can handle it. Your map should be ready for any future needs without needing a full redo.
| Routing Path | Primary Challenge | Best Tool for the Job | Pro Tip |
|---|---|---|---|
| Behind the Tower | Dense cluster of PSU, display, and USB cables. | Velcro straps, modular cable combs. | Group by cable type (power, video, data) before bundling. |
| Under the Desk | Long, dangling cables from desk to floor devices. | Adhesive cable channels, under-desk trays. | Route all cables to a single, clean drop point using a large grommet. |
| Across the Worksurface | Cables for desk lamps, chargers, and peripherals. | Small adhesive clips, shallow raceways. | Follow the natural edges of your desk and monitor stand for a hidden path. |
Don’t wander aimlessly. We’re building a system for data and power. This planning phase is where you impose order on chaos. Get your map right, and the actual work is easy. Get it wrong, and you’re just making a mess.
Choosing the Right Accessories: Trays, Raceways, Channels, Sleeves
Cable sleeves, raceways, and trays are like the wardrobe for your wires. Each piece has its own purpose. The hardware store aisle can be overwhelming. Let’s shop smart, not impulsively.
There are four main categories to understand: unified sheath of cable sleeves, fixed infrastructure of raceways and channels, and utility closet of under-desk trays. Picking the wrong one is like wearing hiking boots to a gala. It works, but it’s not the best choice.
Cable sleeves are like spandex for wire management. They keep loose cords together in a sleek braid. This is great for areas like behind your TV or gaming rig, where cables need to move. But, once you put a lot of wires in, changing things can be tough.
For permanent setups, you need something more like architecture. That’s where raceways and channels come in. These are rigid tracks that you stick or screw into place. Then, you cover them up to hide the mess inside. They make your desk look clean and intentional.
Under-desk trays and baskets are for keeping things practical. They’re not for hiding your mess, but for organizing it. Things like power bricks, spare USB hubs, and Ethernet switches go here. They’re out of sight but easy to get to when you need them.
So, when do you pick a flexible sleeve or a rigid raceway? It depends on whether you need to move things a lot or not. A braided sleeve is good for changing setups often. An adhesive raceway is better for a desk you won’t move for years. Make the right choice, and your setup looks planned. Make the wrong choice, and you might end up using duct tape on a formal suit.
PSU and Case Cable Strategy: Modular Cables, Extensions, Combs
Modular power supplies are more than a luxury; they’re a battle against clutter. A non-modular PSU is like a backpack with everything stuck on. A modular PSU lets you pick only what you need.
This approach simplifies things right away. It means better airflow and easier cable management. Before you buy, figure out exactly how much power you need. Getting a PSU with just the right amount of power and cables is smart.
Then, there’s the look. Stock PSU cables are like hospital scrubs. Custom-sleeved extensions are like a tailored suit. They come in many colors and materials, making your cables stand out.
Cable combs are the tie clips and cufflinks of PC building. They keep your cables neat and organized. Without them, even the best-looking cables can look messy.
So, where do you put all the extra cable? That’s where the PSU shroud comes in. It’s not just for looks; it’s a place to store extra cable. This space can turn messy cables into organized ones.
Your PSU shroud becomes a storage space. Modular cables offer precision. Extensions and cable combs add the finishing touch. Together, they make the power zone a key part of both performance and style.
Monitor Arm Routing and VESA Brackets
We buy monitor arms for that sleek, floating-screen look. But, we often end up with a mess of cables. It’s like buying a sports car but leaving the dealer sticker on.
The solution is simple. Look for monitor arms with integrated cable channels. These channels hide the wires, keeping your desk clean.

When shopping, check more than just weight and VESA compliance. Look for cable-friendly features:
- A dedicated internal routing path from the VESA plate down through the arm.
- Removable covers or sleeves that snap or clip over the channel for a seamless look.
- Ample space at the pivot points to prevent cable pinching during adjustment.
If your arm doesn’t have these features, don’t worry. There are other solutions. For the vertical section, adhesive cable raceways are great. They stick on and keep cables tidy.
For horizontal runs, use hook-and-loop straps or braided cable sleeves. The aim is to keep cables organized, not tangled.
The VESA bracket area is another key spot. A messy cluster of connectors looks bad. Keep cables tight along the monitor’s back before they reach the arm.
Use short cables and secure any slack with a small strap. This way, your monitor looks like it’s floating by itself. It’s a clean, magical look.
Under-Desk Power: PDU Strips, Surge, UPS Placement
The floor is not the best place for your power setup. It’s a dust trap and a hazard. It’s also a mess that ruins your clean desk.
Mounting your power gear under your desk is smarter. It keeps things hidden, yet easy to reach. Plus, it keeps your desk clean from spills and dust.
The under-desk mounting tray is key. It lets you attach a power strip or PDU upside-down. This turns a messy area into a neat utility panel.
- Consumer Surge Protectors: These are common but often bulky. They’re okay for basic protection but not the best for looks or quality.
- Professional PDUs (Power Distribution Units): These are like server racks. They offer clean power and are built to last. They’re perfect for a tidy, industrial-grade setup.
Don’t forget about your UPS. It’s your digital backup. A big UPS needs a strong tray. Use a sturdy tray for the PDU and a shelf for the UPS. This keeps everything safe and easy to access.
This setup isn’t just about hiding wires. It’s about creating a strong, smart power system for your desk. Move away from the floor and go for the underside.
Labeling, Color-Coding, and Service Loops
The last step in cable management is not about hiding wires. It’s about making your system so easy to use, you can find your way even in the dark. This is where neatness turns into true mastery. Anyone can just bundle cables and hide them. But The Sage builds a system that’s like a library, not a mess.
Labeling each cable at both ends is a game-changer. When your monitor goes dark or your DAC stops working, you won’t have to search for wires in the dark. A simple label maker or clear tape turns a frantic search into a quick fix. It’s the difference between a tidy room and a well-organized archive.
Color-coding takes it to the next level, adding a visual language. Use colored Velcro ties, heat-shrink sleeves, or tags to show what each cable is for. This way, your setup is easy to understand at a glance.
The service loop is another key concept. It’s the extra slack you leave at connection points. This makes it easy to unplug, check, or swap components without messing up your whole setup. No more straining ports or re-routing everything for a simple change. A little extra slack gives you a lot of freedom in the future.
This approach needs the right tools. We recommend reusable Velcro ties over permanent zip-ties. The real test of a system is how well it adapts over time. Zip ties say “final,” while Velcro ties say “evolving.”
| Method | Best For | Pros | Cons | Flexibility Score |
|---|---|---|---|---|
| Permanent Zip Ties | Final, never-change installations. | Extremely secure, very low profile. | Destructive to remove; zero adjustability. | 1 / 5 |
| Reusable Velcro Ties | Almost everything; the versatile workhorse. | Infinitely adjustable, non-destructive, great for color-coding. | Bulkier than zip ties; can collect dust. | 5 / 5 |
| Printed Cable Labels | Complex setups with many identical cables (USB, network). | Permanent, professional identification. | Requires a label maker; can be time-consuming. | 4 / 5 |
| Color-Coded Sleeves | Instant visual sorting (by device type or priority). | Extremely fast to “read”; clean look. | Must be planned during cable prep; less specific than labels. | 3 / 5 |
| Service Loop Technique | Connection points at PCs, monitors, PDUs. | Makes maintenance and swaps effortless. | Requires thoughtful planning of extra cable length. | 5 / 5 |
Using labels, color, and loops changes how you interact with your gear. You move from being a caretaker of a static setup to the curator of a dynamic system. Troubleshooting becomes less stressful, and upgrades are less daunting.
Begin with small steps. Label your two most important cables tonight. Swap a few zip ties for Velcro ties. Create a generous loop behind your PC. You’re not just organizing wires; you’re building a system that brings you peace of mind. And when you need to make changes, you’ll be grateful for your foresight.
Hiding External Boxes: Switches, Hubs, DAC/Amps
Think of network switches, USB hubs, and DAC/amp stacks as the supporting cast of your desk. They’re essential but better hidden. These devices are the necessary evils of modern computing. They multiply in the shadows of our desks, creating little monuments to technological compromise.
I call them “peripheral peripherals.” They serve our main gear but demand real estate we’d prefer for other things. Their visual noise disrupts the clean lines we’ve worked so hard to achieve. The goal isn’t just hiding them, but strategically relocating them.
Think like a theater director. Your monitor, keyboard, and mouse are the stars. Everything else belongs in the wings, ready for its cue but not distracting from the main performance. This philosophy transforms a cluttered desk into a focused command center.
Let’s examine practical solutions. Each addresses the core challenge: maintaining full functionality while banishing visual clutter.
Under-desk shelves offer the simplest approach. These inexpensive racks mount directly to your desk’s underside. They keep devices accessible yet invisible from your seated position. Just ensure proper ventilation for anything that generates heat.
Custom 3D-printed brackets represent the tinkerer’s paradise. Designed to attach to desk legs or rear panels, they turn wasted vertical space into organized storage. The beauty lies in customization—creating perfect fits for your specific devices.
Modified desk drawers provide the stealth option. With some basic modifications and passive cooling (think strategic vent holes), a standard drawer becomes a hidden equipment bay. This works exceptionally well for rarely-accessed items like network switches.
The table below compares these approaches to help you choose your weapon against boxy distractions:
| Hiding Method | Cost Estimate | DIY Difficulty | Device Accessibility | Aesthetic Impact |
|---|---|---|---|---|
| Under-desk Shelf | $15 – $40 | Low | High | Excellent |
| 3D-Printed Bracket | $5 – $20 (filament) | Medium-High | Medium | Superior |
| Modified Drawer | $10 – $30 (materials) | Medium | Low-Medium | Invisible |
| Commercial Mount | $25 – $60 | Low | High | Very Good |
Notice how each solution balances different priorities. The modified drawer wins on aesthetics but loses on accessibility. The commercial mount offers convenience at higher cost. Your choice depends on which trade-offs you can live with.
Here’s my pro tip: group devices by function and heat output. Keep your DAC/amp stack together as you might adjust volume. Isolate the network switch—it runs warm and you rarely touch it. USB hubs belong somewhere easily reached for plugging in temporary devices.
Passive cooling matters more than you think. Those little boxes weren’t designed to be stuffed in enclosed spaces. Always leave air gaps above heat-producing devices. Consider adding small, silent fans if you’re creating an enclosed compartment.
This final purge of boxy distractions completes your cable management battle station. When done right, the only items on your desk are the tools you actively touch. Everything else supports from the shadows, like a well-stage-managed production where the technology serves you, not the other way around.
The transformation feels almost theatrical. One day you’re staring at a pile of plastic boxes. The next, you have a clean surface with hidden infrastructure. It’s the difference between working at a desk and commanding from one.
Fast Swaps for Reviewers and Tinkerers
My routing philosophy for a lab-grade desk is simple: everything must be accessible for a full teardown before the coffee gets cold. For the hardware reviewer, the modder, the perpetual tinkerer, a pristine, permanent cable job is a prison sentence. Your battle station needs to be a modular lab. This isn’t about hiding wires forever. It’s about designing for the next inevitable change.
The core tenet is reconfigurability. You’re not building a museum piece. You’re engineering a system that welcomes chaos. The next GPU, the next keyboard, the next toy is always on the horizon. Your cable management must not just allow for that, but eagerly anticipate it.
Your toolkit shifts dramatically. Say goodbye to permanent zip ties. Your new best friends are quick-disconnect specialists. Magnetic USB-C and USB-A adapters are genius—they separate before any cable gets strained. Extension cables with chunky, easy-grip ends let you swap peripherals without yanking on the primary wire’s delicate port. These are the details that save your gear and your sanity.
And then there’s the hero, the undisputed champion of the modular desk: the humble Velcro tie. Use them in abundance. Where a zip tie is a life sentence, a Velcro tie is a temporary contract. It holds your routing paths neatly in place during daily use, but yields in seconds when you need to re-route a new power cable or add another sensor. It’s the fast fastener for the fast-paced.

Think of your desk’s underside not as a finished basement, but as a race car’s wiring loom. Every line has a planned path—clean and secure against vibration—but every connection is designed for a pit-stop swap. This approach means creating gentle service loops at key junctions and avoiding tight bends that make extraction a puzzle. The goal is a routing scheme that looks organized but is fundamentally open for business.
This modular mindset applies to everything, even the gear you review. A clean, intentional setup isn’t just for you; it’s a professional standard. For a masterclass in this thinking, check out the professional setup deep-dive in this Verge feature, where accessibility meets daily workflow.
To crystallize the difference between a static and a dynamic setup, let’s break it down side-by-side.
| Aspect | Permanent Setup | Tinkerer’s Modular Setup |
|---|---|---|
| Philosophy | Set it and forget it. Aesthetics are final. | Organized but temporary. Built for repeated change. |
| Primary Fastener | Plastic zip ties, adhesive clips. | Velcro ties (hook-and-loop), magnetic holders. |
| Accessibility | Low. Changes often require cutting and re-doing entire runs. | High. Individual cables can be removed or re-routed in minutes. |
| Ideal For | Finalized workstations, office environments. | Hardware reviewers, PC builders, tech enthusiasts, product testers. |
Embracing this method means your desk is never “finished.” And that’s the point. It’s a living workspace, always ready for its next iteration. The cleanest cable job is the one you can dismantle and improve before your motivation fades.
Before/After Showcase Examples
Let’s dive into real-life examples of Cable Management Battle Station transformations. They look like they were done by a digital Marie Kondo. Theory is nice, but nothing beats seeing the before and after photos.
We’ll explore a few real-world makeovers. From a messy home office to a sleek streaming setup. Each story shows how chaos can be tamed with the right strategy.
First, we have the home office desk. Its before photo was chaotic. It had a mess of power strips, monitor cables, and charger cords. It looked like a modern art piece called “Anxiety.”
The desk had no under-desk routing, so everything was exposed. Piled-up external boxes made a cluttered skyline.
We fixed this with a few smart moves. We installed a rigid raceway under the desk. The PDU was mounted upside-down in it. All cables were put through a large sleeve, making a single trunk line. The monitor used a VESA bracket with built-in channels.
The results were amazing. The desk’s internal temperature dropped by 3°C. This was thanks to better airflow from the fans. The user found cables instantly, no more 30-second searches.
Next, we tackled the streaming setup. It was a content creator’s nightmare. There were wires for two cameras, a microphone, an audio interface, and LED panels. The desk looked like it was on life support.
We tackled it methodically. We raised the main display with a monitor arm. A under-desk cable tray hid the USB hub and audio DAC. We used color-coded labels for all audio cables. Service loops were coiled and velcro-strapped behind the tower.
The after photo shows a mission control look. It’s not just about looks. The streamer can now swap out gear for reviews without a wire mess.
The data from these makeovers is clear. It’s not just about looks. It’s about better performance and sanity. The table below shows the key improvements.
| Battle Station Area | Before State | Key Solution Applied | After Result | Measurable Gain |
|---|---|---|---|---|
| Home Office Desk | Spaghetti junction, dangling cables | Under-desk raceway & sleeve trunk | Clean lines, hidden infrastructure | 3°C lower CPU temp, 30s time saved |
| Streaming Setup | Piled boxes, tangled audio/video cables | Monitor arm, cable tray, labeling | Professional, modular layout | Unobstructed airflow, quick swap ability |
| Gaming Corner | PSU cable clutter, no combs | Modular cables, combs, under-desk PDU | Showcase-wire interior, clean floor | Improved GPU airflow, reduced dust intake |
Looking at these cases, we see a pattern. The main problems are lack of paths, exposed boxes, and no labels. The solutions are specific and can be applied. Adding a raceway isn’t just about hiding wires. It’s about creating a dedicated path for electrons.
Mounting a PDU isn’t just about saving space. It turns a tangled power source into a managed utility. The victory is in the details. Lower component temperatures mean longer hardware life. A clean desk is the secret to better productivity.
This is the victory lap. The principles we’ve discussed are not just ideas. They are real and can transform your space. Your own Cable Management Battle Station evolution is waiting. The only question is, what does your “before” photo look like?
Maintenance Schedule and Dust Control
Think of your cable routing like the Sistine Chapel ceiling. Without regular care, it will soon look like a dusty attic. The initial victory over cable chaos is just the start. Without upkeep, even the most elegant systems will fall to dust and disorganization.
This isn’t a design flaw. It’s a natural law. The answer isn’t to create a museum piece. Instead, establish a maintenance protocol. View it as regular, essential work for your tech setup. A well-kept cable system is a daily use item, not a showpiece.
I suggest a simple, quarterly “desk audit.” Set aside 15 minutes. That’s less time than scrolling through your phone before bed. Here’s how to do it:
- Visual Inspection: Check the entire routing path. Tighten any loose Velcro straps or combs. Put new wires in their place.
- The Dust Purge: This is key. Cable trays and under-desk areas are dust magnets. Use compressed air or a soft brush to clean them. It’s not just for looks; it keeps components cool and working well.
- System Reassessment: Has your setup changed? Do you need a new routing path? Is your under-desk power strip up to date? This is your chance to adjust your system, not just clean it.
This audit fights the two main enemies of clean routing: physical changes and dust. Dust isn’t just ugly; it traps heat. This harms your PSU cables, network switches, and other warm components.
By making this a regular habit, you turn a one-time effort into a lasting practice. Your routing system stays organized, adaptable, and clean. It’s the key to keeping your resolutions, not just for a few weeks. Sustainable cable management is about steady, consistent effort.
Budget vs Premium Solutions
A clean desk doesn’t need a big budget. The 80/20 rule works here too. You can get a great setup for less if you’re smart about it.
Being frugal is American ingenuity. Use adhesive hooks on desk legs. Repurpose zip-ties through case holes. Split loom tubing from auto stores is cheap and works like cable sleeves.
Premium options are for those who love to show off. Think custom acrylic raceways and sleeved cable kits. These are pricey but look amazing.
Is spending $100 on cable extensions worth it? Yes, for Instagram-worthy builds. But for everyday use, save that money for a faster SSD.
Under-desk trays and raceways also have budget options. A $15 basket works almost as well as a $80 setup. The key is planning and effort, not just money.
Here’s a quick comparison to illustrate the trade-offs:
| Category | Budget Solution | Premium Solution | Best For |
|---|---|---|---|
| Cable Sleeves | Split loom tubing, spiral wrap | Custom paracord or PET sleeves | Budget: Hidden cables. Premium: Visual showcase. |
| Raceways & Channels | Plastic adhesive channels, DIY wood trim | Aluminum or acrylic custom-cut raceways | Budget: Quick fixes. Premium: Permanent, clean installs. |
| Under-Desk Trays | Wire mesh baskets, repurposed shelf brackets | Integrated steel trays with grommets | Budget: Heavy power strips. Premium: All-in-one hub systems. |
Cost doesn’t equal competence. Premium tools are great, but they’re not a magic fix. Start with a solid plan and use smart, affordable tools. Upgrade later if you can. Your cables won’t care, but your wallet will.
Troubleshooting Tangles and Snags
Any cable management system is truly tested when it faces a snag. A new streaming mic arrives, and a monitor cable breaks. Suddenly, your desk looks like it’s been shaken. This is when you need to act fast, but carefully.
Adding a new wire to your setup can be tricky. Don’t pull everything out. Instead, use a plastic spudger to gently lift cables. Then, slide the new cable underneath and secure it with tape. This keeps your setup looking neat.
What if your under-desk raceway is sagging? This is often due to weight or weak adhesive. Fix it by adding strong tape or screws. This will keep the raceway looking straight and prevent future dips.
Dealing with a grommet hole that’s too full can be a challenge. You’ve got a guide for cable management, but now you need to add another cable. To avoid pinch points and heat, consider re-routing cables or combining them in a sleeve.
| Snag Type | Symptoms | Immediate Action | Long-Term Fix |
|---|---|---|---|
| New Cable Integration | Bundle won’t close; loose wires visible. | Use a spudger to create space in the sleeve. | Plan for spare capacity in raceways during initial setup. |
| Sagging Raceway | Visible dip under the desk; adhesive failing. | Apply temporary support with strong tape. | Install with screws or a central mounting bracket. |
| Overstuffed Grommet | Cables are pinched, difficult to move. | Remove one cable temporarily to relieve pressure. | Distribute cables across multiple grommets or use a passthrough brush. |
| Tangled Service Loop | Extra cable length is knotted, creating pull. | Unplug devices, fully unravel the loop. | Secure the loop with a dedicated Velcro strap, separate from the main run. |
My emergency toolkit is always ready. It includes a spudger, Velcro, a flashlight, and patience. Finding the source of a problem is key. It’s like being a network admin who fixes one switch instead of rebooting everything.
The key is “localized intervention.” Fix the specific problem, not the whole system. This saves time and keeps your desk organized. Remember, a clean desk is a journey, not a one-time fix.
Conclusion
So, what’s the final verdict on your cable management battle station? It’s not just a display. It’s a dynamic system that shows off your organizational skills.
You started by mapping out the mess and ended up with a clear plan. This journey transformed your space into a place of purpose. Now, your cable management station boosts airflow and helps you stay focused.
The mess is gone, replaced by easy-to-use service loops and clear paths. This order brings a quiet peace. It reduces visual distractions, freeing your mind for important tasks.
Keeping your station organized is now a simple habit, not a big task. Dust has fewer places to hide. Upgrades and changes are no longer scary adventures in a sea of wires.
Your setup shows you value efficiency. The real victory isn’t hiding cables. It’s about reducing the obstacles in your way. Now, you’re ready to tackle the real challenges and enjoy the process.