
Forget the glossy ads and influencer hype. Building a powerful gaming rig isn’t about collecting the shiniest components like trading cards.
It’s a ruthless exercise in resource allocation. Think of it as political economy for your desk.
Our guiding metric? Frames per second per dollar. This isn’t just about raw power; it’s about value efficiency. Where does your next dollar deliver the biggest visual payoff?
I’m here to analyze the diminishing returns curve for every part. We’ll find the sweet spot where performance meets pragmatism.
This requires a strategic cost breakdown. Allocate funds like a savvy campaign manager. Divert cash from overhyped line items to critical swing states: the GPU and monitor.
The goal is a cohesive, stylish command center. One that makes a mid-range investment look like a billionaire’s folly.
Parts List with Justifications
Let’s move from talking to doing. This is the parts list for our budget gaming setup. We’re focusing on value, not just brand names. It’s time to make a plan.
The CPU is like the leader of your PC. You need a strong, mid-range CPU, not just a figurehead. For AMD, the Ryzen 5 5600 is a great choice. It has six cores for gaming and streaming without stress. Its integrated graphics are handy for quick fixes but not for serious gaming.
Intel’s Core i5-12400F is a good alternative. It’s efficient and reliable, often at the same price as the AMD. The “F” suffix means it lacks integrated graphics, expecting a dedicated value GPU from the start.
The graphics card is your entertainment minister. We aim for a value GPU that’s 90% as good as top models but costs 50% less. The AMD Radeon RX 6600 or NVIDIA GeForce RTX 3060 are great choices. They’re the hardworking team members, not the flashy leaders.
Memory is like your system’s parliament. We recommend 16GB of DDR4 RAM for smooth multitasking. With 8GB, you’ll face too many delays. 16GB lets your game, browser, and Discord chat without issues.
Power and cooling are the behind-the-scenes workers. A 550W or 650W 80+ Bronze power supply is essential. It’s the solid base. Add a simple air cooler or the stock CPU cooler. Their job is to keep things running smoothly, not to show off.
For those on a very tight budget, consider the APU option. The AMD Ryzen 5 5600G is like a temporary government. Its integrated graphics are good for some games and older titles. It’s a temporary fix until you can afford a dedicated GPU.
| Component | Primary Recommendation | Budget Alternative | Justification |
|---|---|---|---|
| CPU | AMD Ryzen 5 5600 | Intel Core i5-12400F | Maximizes cores per dollar; iGPU is a useful fallback on the Ryzen. |
| GPU (Value Pick) | AMD Radeon RX 6600 | NVIDIA GeForce RTX 3060 (Used) | Delivers high-fidelity 1080p gaming; the best performance-per-dollar ratio. |
| RAM | 16GB DDR4-3200 | 16GB DDR4-3000 | The absolute minimum for modern gaming and multitasking stability. |
| Power Supply | 650W 80+ Bronze | 550W 80+ Bronze | Provides stable, efficient power with headroom for future upgrades. |
| APU Option | AMD Ryzen 5 5600G | AMD Ryzen 7 5700G | A capable integrated graphics stopgap for ultra-tight budgets. |
This list is about value, not show. Each part is chosen for its performance, not fame. Together, they create a solid team for your budget gaming setup that will deliver great gaming.
Used/Refurbished Components: Risks and Wins
Looking for second-hand components is like searching for a good candidate in a crowded field. You’re looking for a deal that won’t turn sour. The chance for a fiscal miracle is there, but so is the risk of a big failure. Your first step is to check everything carefully.
A used GPU from a clean, well-maintained source is a good find. These cards are often cheaper and have been well taken care of. But, a used power supply can be a disaster waiting to happen. Its old capacitors can cause big problems.
For monitors and pre-built systems, look for “certified refurbished” options. Companies like Samsung and Dell are now focusing on quality. Samsung’s OLED Safeguard+ and Dell’s Premium Support offer peace of mind. A certified refurbished item comes with a clean start and a warranty from the maker.
When you have to buy used, here are some tips to help. They’ll prepare you for what to expect.
- Platform Scrutiny: On eBay, look for “Top Rated Sellers.” Check their electronics sales feedback.
- The Original Box Test: If the item comes in its original box, it might mean the seller cared. It’s a good sign.
- The Interrogation: Ask why the seller is parting with the item and for any receipts. A vague answer is a warning sign.
- Stress-Test on Arrival: This is essential. Run tests like FurMark for GPUs and MemTest86 for RAM right away. Your return policy is your only protection.
| Component Type | Risk Level | Warranty Safety Net | Typical Savings | Best For |
|---|---|---|---|---|
| Used (e.g., GPU, RAM) | Moderate to High | Usually None (Seller Dependent) | 30-50% | Experienced builders who can test thoroughly. |
| Certified Refurbished (e.g., Monitor, Laptop) | Low | 1-3 Years (Manufacturer) | 20-40% | Everyone. This is the value sweet spot. |
| Used Power Supply | Extremely High | Virtually Never | 50-70% | No one. Consider this a banned substance. |
The benefits are clear: saving 30-40% on a key part can fund your next upgrade. But, there’s a risk of getting something that’s useless. Smart budget builders mix both markets. Use used parts for easy-to-test items where you can afford to lose money. Always choose certified refurbished for complex, expensive items where the warranty is key.
Case and Desk Choices on a Budget
Forgot RGB. The real luxury in a budget build is a good case and a deep desk.
Your PC case is not just for looks. It’s a place to keep your electronics cool. On a budget, look for efficient airflow. Choose something simple and practical, not flashy.
The mesh front is key. It lets cool air in and hot air out. Brands like Fractal Design and Phanteks make great budget cases with mesh fronts.
A cooler CPU or GPU means better performance. It’s like finding ways to save money without cutting important things.
Now, let’s talk about your desk. It’s your main base. You don’t need to spend a lot. Focus on the basics.
The IKEA Linnmon tabletop with Alex drawers is a smart choice. It’s affordable and looks good. Choose a deep desk for more space.
A deep desk gives you room for everything. It makes your space calm and organized. Your budget build should look intentional, not cramped.
For a minimalist, try a door-desk. A solid-core door on two filing cabinets works well. It’s stable and deep, but might lack cable management.
Here’s a comparison of budget cases that focus on airflow. The ones with mesh fronts do better at keeping things cool.
| Case Model | Key Feature | Approx. Price | Included Fans | Airflow Rating |
|---|---|---|---|---|
| Fractal Design Focus G | Full mesh front panel, acrylic window | $55 | 2 x 120mm | Excellent |
| Cooler Master MasterBox NR600 | Fine mesh intake, minimalist design | $75 | 2 x 120mm | Superior |
| Phanteks Eclipse P300A | Steel mesh front, compact ATX | $60 | 1 x 120mm | Very Good |
| Corsair 4000D Airflow | Premium mesh filter, cable management | $90 | 2 x 120mm | Best-in-Class |
| Lian Li LANCOOL 205M | Mesh front & top, tempered glass | $70 | 2 x 120mm | Excellent |
Your desk choices and case selection are key. They affect ergonomics, cooling, and enjoyment. Spending wisely on these areas improves comfort and performance. In a budget build, focus on the foundation, not just the top.
Lighting on the Cheap (High Impact, Low Cost)
Bad budget lighting is like a loud, annoying political ad. It’s something you want to ignore. Good lighting, on the other hand, is like a well-made documentary. It sets the scene, creates mood, and makes everything else better. We aim for that, using money found in unexpected places.
Forget expensive tech systems. They’re like political dynasties. We’re doing RGB diplomacy with simple USB LED strips and RGB strips. They talk a language everyone understands.
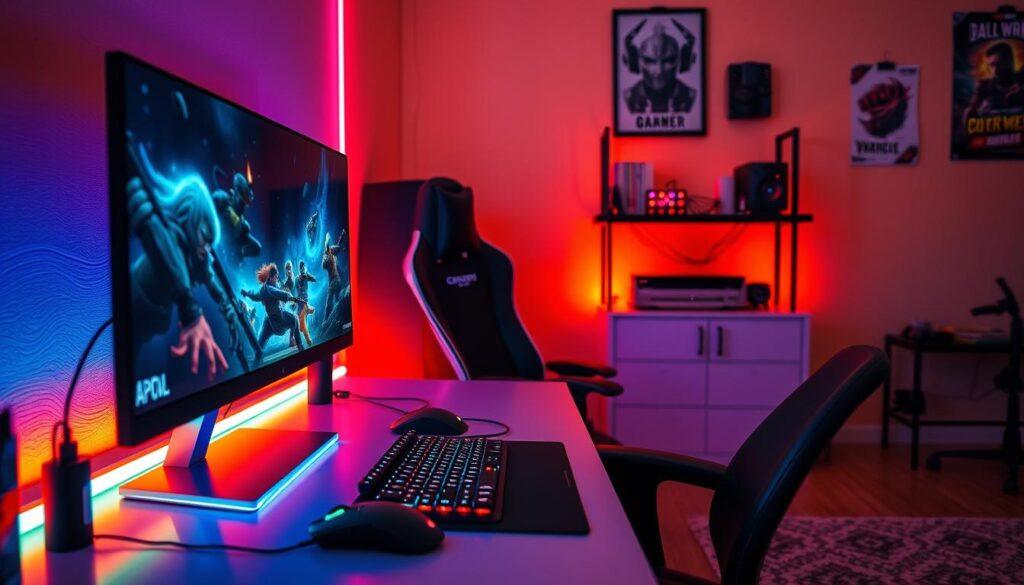
The first trick is bias lighting. Film editors have used it for years. Just tape a white or warm-white LED strip to your monitor’s back. It softens the contrast between the screen and dark surroundings. This reduces eye strain and makes your display seem better.
Next, we add the ambient glow. It’s not about making your desk flashy. We aim for the soft light of a library. Place a RGB strip inside your PC case and another under your desk.
Choose one color for your theme. A deep blue, a muted green, or a warm orange. This shows you’ve thought it through. Avoid the rainbow cycle, which looks like a mess.
Controlling the lights is easy. A simple remote works. Or, use free software like SignalRGB for more control. You can do it all for under thirty dollars. This turns your desk into a space that communicates your style and thriftiness.
Monitor Picks: 1080p/144Hz vs 1440p/100Hz
The debate over monitors for a value build is more about personal preference. It’s about whether you value speed or detail. Choosing a monitor is like picking your gaming identity.
On one side, you have the 1080p, 144Hz fans. They believe in smoothness above all. The 1920×1080 pixel grid is easier for GPUs to handle, ensuring high frame rates.
On the other side, there are the 1440p supporters. They prefer more detail and screen space. With 2560×1440 pixels, everything looks sharper and more immersive. But, your graphics card has to work harder.
Let’s look at the numbers. Moving from 60Hz to 100Hz makes motion smoother. Going from 100Hz to 144Hz is more about refinement. For most, a 100Hz+ experience is very satisfying.
Adaptive sync is essential. Technologies like AMD FreeSync Premium or G-Sync Compatible eliminate screen issues without performance loss. They make your monitor feel smooth, even when your frame rate drops.
The smart choice is the secondary market. Here, you can find refurbished monitors at great prices. Last year’s high-end 1440p panels are often available at discounts. This is a smart way to get more for less, following a philosophy of value.
Refurbished 1440p/100Hz+ monitors offer great visuals for a similar price. The risk is low, with many sellers providing warranties. The reward is a screen that doesn’t feel like a compromise.
Your final choice depends on your GPU. If you have a budget GPU, 1080p/144Hz is the best choice. If you have a stronger GPU or plan to upgrade, a 1440p monitor is better. Choose a monitor that fits your future plans, not just your current build.
Peripherals: Value Boards, Mice, Headsets
Finding good peripherals on a budget is like a smart campaign. It’s about picking the right things and avoiding the expensive stuff. Your keyboard, mouse, and headset are your way into the digital world. In a budget gaming setup, they shouldn’t cost too much.
We’re skipping the high prices of mainstream marketing. Instead, we’re looking for useful performance. It’s like choosing policy over personality.
The keyboard is key. You need mechanical switches for fast and accurate typing. But you don’t have to spend a lot to get them.
Look for brands that are popular on Reddit, not in Super Bowl ads. A tenkeyless (TKL) keyboard saves money and space. It’s a smart choice for the practical gamer.
The mouse is fast and accurate. You need a good sensor and a comfortable shape. Too many buttons are just a waste.
Older sensors are often just as good as the latest ones but cheaper. A mouse that fits your hand is the best ally.
Audio is like your budget gaming setup‘s diplomatic team. The usual choice is a “gaming” headset. But there’s a better way.
Using quality in-ear monitors (IEMs) with a desk microphone gives better sound and clear chat. It’s a smart move that makes a big difference. You can hear everything clearly, from footsteps to commands.
This way of choosing often beats a single, expensive headset. It’s all about focusing on what works best.
To show you the best choices, here’s a table for each peripheral category.
| Category | Value-Focused Pick | Key Features | Approx. Price |
|---|---|---|---|
| Keyboard | Tenkeyless Mechanical (e.g., Redragon K552) | Outemu Blue/Brown switches, aluminum top plate, RGB backlighting | $35 – $50 |
| Mouse | Proven Sensor Model (e.g., Logitech G203) | Mercury sensor, 6 programmable buttons, lightweight design | $20 – $30 |
| Audio Solution | IEMs + Desk Mic (e.g., KZ ZSN Pro & Fifine K669) | Detailed soundstage, noise-canceling mic, modular upgrade path | $45 – $65 |
Each choice focuses on what’s important. The keyboard has tactile switches. The mouse has a great sensor. The audio setup gives clear sound and chat.
This is how you create a budget-friendly gaming setup. It’s not just about buying stuff. It’s about investing in how you interact with games. Your budget gaming setup needs peripherals that work well, not just look good.
Cable Management for Budget Builds
A tangled mess of wires isn’t just an eyesore; it’s a thermodynamic protest against your CPU’s right to cool air. Think of your PC case as a miniature city-state. Unmanaged cables are the unruly mob blocking the vital avenues—the airflow channels—that keep your components from overheating. This isn’t about vanity. It’s about systemic integrity and long-term stability.
Good cable management is the internal policy of your station. Chaos leads to poor airflow, which forces fans to work harder, accumulates dust like bureaucratic red tape, and creates mental clutter every time you need to upgrade or troubleshoot. You’re not building a art installation for a museum. You’re establishing a functional, efficient government for your hardware.
The fantastic news? You don’t need a lavish budget for custom-sleeved PSU cables. The tools of this trade are cheap and brutally effective. Your policy toolkit consists of:
- Zip ties: The relentless civil servants of the wire world. They bind and hold without question.
- Velcro straps: The flexible, reusable regulations. Perfect for areas you might need to access later.
- A plan: The most critical component. Before you start plugging things in, look at your case’s layout and envision the routes.
Start with the motherboard power cable, the main artery. Route it behind the motherboard tray if your case has that space—a dedicated back channel for covert operations. Use the case’s built-in rubber grommets and tie-down points. These are the designated legislative pathways your case manufacturer provided. If your budget case lacks them, the side panel gap often works as a sufficient shadow government for routing.
Next, address the desk itself. The “snake-pit” of power bricks, monitor cables, and peripheral wires is the visible, messy democracy of your setup. Here, a $10 cable sleeve or a simple roll of velcro can bundle this chaos into a single, tidy trunk. It’s the difference between a riot and a peaceful, organized march.
This process signals control. A clean build tells you—and anyone who sees it—that this machine was considered, not just assembled. The airflow is unobstructed, making cooling more efficient and silent. Dust finds fewer nooks to settle in. When you need to swap a component, you won’t face a Gordian knot of wires.
In the end, cable management is the quiet, efficient department of the interior for your PC. It works in the background, enabling everything else to perform at its best. For a budget builder, it’s the highest return-on-investment policy you can enact. No extra hardware required, just a bit of time and intention.
Upgrade Path Over 12–24 Months
Building a budget PC is like making laws. You start with basic rules that let you make bigger changes later. It’s not about buying something ready-made. It’s about building a base that can grow.
We picked a motherboard for its CPU upgrade path and a big power supply. This is like a smart plan for your desk. You’re not setting up a wall. You’re making a space to grow.
Your first step is like writing a constitution. The big changes come after that. Let’s plan out how your computer will grow over time.
| Timeframe | Component | Action | Strategic Rationale |
|---|---|---|---|
| Month 12 | Graphics Card (GPU) | Add a second-hand, higher-tier GPU from the next generation. | Prices on old models drop when new ones come out. This is a big jump in performance for less money. |
| Month 18 | System Memory (RAM) | Double your RAM capacity with an identical kit. | Games and multitasking use a lot of memory. Adding more is cheap and fixes a problem. |
| Month 24 | Processor (CPU) | Drop in a used, last-generation flagship CPU. | By then, that expensive chip is cheaper. It uses your motherboard’s features without needing a new one. |
This way, your computer keeps getting better. It’s like playing a long game. Your first move sets up for a stronger second move.
The 12-month GPU upgrade is a big deal. You buy a good mid-range card now. Then, you get a used high-end card for a steal. You save a lot of money.
The 18-month RAM expansion is just smart planning. It’s like filling a seat you knew you’d need. You bought a motherboard with extra slots. Now you just fill them.
The 24-month CPU swap is your smart move. It’s like bringing in a seasoned leader. The platform stays the same, but the leadership gets a boost.
This isn’t just saving money. It’s making sure every part of your PC stays useful. That big case, strong power supply, and smart motherboard all get more value. They make this upgrade path possible.
You’re not just building a PC. You’re starting a dynasty. One with a clear plan for growth.
Example Room Layouts
A budget build’s true test isn’t the benchmark, but where it lives. Even the best components can be ruined by a cluttered space. Let’s talk about how to arrange your room.
Your room is the stage. The PC is just one actor. How you set the scene defines every session. I see three classic room layout archetypes for the cost-conscious gamer.
First, the Corner Command Post. This is the classic fortress. It uses dead space, tucking your monitor and keyboard into a corner. The walls wrap around you, boosting immersion. It feels focused, like a cockpit.
But beware the glare. Corner desks often catch window light at a nasty angle. Your budget monitor’s weaker anti-glare coating will betray you. The fix? Position your screen so the primary light source is behind it, not beside it.
Next, the Wall-Mounted Minimalist. Here, you use a monitor arm to clamp your display to the wall or desk edge. The entire desk surface is freed. No stand, no clutter. It promotes a clean, almost surgical aesthetic.
This gaming setup is about focus. With nothing on the desk but your mousepad and keyboard, distractions vanish. The sightline is pure. Just ensure your wall or desk can handle the weight. A wobbly screen is immersion’s executioner.
Lastly, the Dual-Purpose Territory. This is the reality for many. Your battle station is also your home office. The key here is smart peripheral sharing and easy cable disconnects.
Consider a KVM switch or a monitor with multiple inputs. Your work laptop and gaming PC can share the same screen, keyboard, and mouse. At day’s end, one cable swap transforms the space. It’s a two-faced setup, and it must be seamless.
Natural light is the nemesis of budget monitors. Direct sun will wash out your screen. Analyze your room’s light path throughout the day. Position your desk so the window is to your side or behind you. Never in front.
The goal is to make your gaming setup feel like an intentional part of your room. Not a plastic-and-LED invader. Cable management, as we discussed, is your first step toward domestic peace. For more gaming room setup inspirations, look at how others integrate their gear.
| Layout | Best For | Biggest Challenge | Pro Tip |
|---|---|---|---|
| Corner Command Post | Immersive single-player games | Glare control | Use blinds or position monitor parallel to window |
| Wall-Mounted Minimalist | Competitive, clutter-free focus | Sturdy mounting surface | Invest in a heavy-duty monitor arm |
| Dual-Purpose Territory | Work-from-home gamers | Switching between systems | Use a KVM switch or monitor with built-in hub |
Your room layout is a silent partner in every game. A good one makes a modest budget build feel premium. A bad one makes even powerful hardware feel like a chore. Plan the space as carefully as you picked the parts.
Performance Benchmarks vs Mid-Range
Benchmarks are like political debates in the PC world. Our underdog, a $1,500 build, faces a $2,200 mid-range system. The results show how well our budget contender does.
At 1080p, our budget build holds its own. The value GPU is 15 to 20 percent behind the mid-range. In Cyberpunk 2077 on High, it’s 86 fps to 102 fps. For most, this difference is small.
At 1440p, the gap grows. The value GPU is 25-30% behind. This raises a $700 question: Is spending more worth it?
Frame times and 1% lows tell the real story. Our budget build’s lows are close to the mid-range. It’s smooth and quiet, showing smart part choices.
Let’s summarize the key points:
- 1080p Dominance: Most gamers won’t notice a difference. Spending more than $1,500 isn’t worth it.
- 1440p Compromise: You might lower some settings. But visuals and frames are great.
- Value Realization: This build offers more than its price. It’s practical and delivers results.
Our budget build may not win every benchmark. But in real-world gaming, it’s a strong contender. It shows smart spending can challenge more expensive systems. The value GPU is more than a part; it’s a statement.
Common Budget Mistakes
Let’s look at the mistakes people make with their budgets. Every builder has a story of failure. We aim to learn from these mistakes, not to shame. By understanding these errors, you can become a better planner.
The biggest mistake is a bad cost breakdown. Imagine a powerful CPU with a cheap GPU. It’s like a high-performance engine in a slow car. Your computer’s performance suffers. Spend more on the GPU to improve performance.
Another mistake is spending too much on looks and not enough on quality. You might spend $100 on fancy fans but get a cheap power supply. The power supply is critical. Choose quality over looks.
Then, there’s the mistake of trying to future-proof too much. You might buy an expensive motherboard but a slow SSD. A slow SSD makes your computer slow every day. Focus on parts that improve your daily experience.
Lastly, don’t skimp on the monitor. You might choose a great GPU but a low-quality monitor. A good monitor makes your computer feel complete. Invest in a good monitor.
| Mistake | The Consequence | The Smart Fix |
|---|---|---|
| CPU/GPU Budget Imbalance | Bottlenecked performance, wasted money | Follow a balanced cost breakdown guide, prioritize GPU |
| RGB over PSU Quality | System instability, risk of component failure | Buy a reputable PSU first, add aesthetics later |
| Over-“Future-Proofing” the Motherboard | Money tied up in unused features, slow storage | Buy a mid-range board, invest in a fast NVMe SSD |
| Cheaping Out on the Monitor | Your powerful PC looks and feels mediocre | Allocate a significant portion of your budget to a quality display |
Knowing these mistakes is key. It turns building a PC into a strategic plan. For more tips, check out this student budget guide. Your best tool is skepticism. Question every dollar. Your perfect PC is waiting.
Conclusion
So, what have we constructed in this fiscal exercise? More than a pile of components. We’ve built a philosophy.
A true budget battle station isn’t defined by its compromises. It’s carved from strategic choices. We chased maximum FPS per dollar. We weighed the risks and rewards of the used market. We invested wisely in the elements you touch and see every day.
The monitor, the keyboard, the chair—these aren’t afterthoughts. They are the experience. Our sub-$1,500 blueprint proves that. It delivers style and substance without following the marketing department’s siren song, while still leaving room to integrate tools like multiplayer game hosting solutions that expand what your setup can do.
This approach is your blueprint. Your own budget battle station awaits. It’s a command center built on analysis, not apology. Now go build it. Take the victory lap with every smoothly rendered frame.