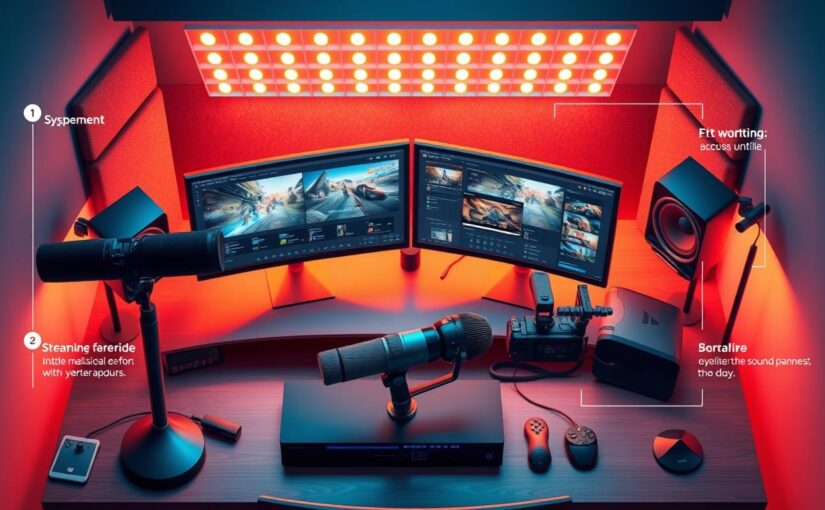
Let’s cut through the noise. Building a successful streaming setup isn’t about buying the shiniest gear. It’s about creating a workflow that can handle the pressure of a live audience.
Think of it as a three-act play. Your Gaming rig is the main show. The Capture hardware is your backstage crew. And the Monitoring station is your director’s booth. Getting this right makes all the difference between a smooth broadcast and a disaster.
We’re diving into this critical triad. In live content, your process is your most valuable asset. It’s not just about the gear, but the philosophy of intentional setup. The right capture card or monitor is just part of a bigger system.
Camera Choices: APS-C vs Full-Frame vs Webcam
Forget about megapixels for now. The real question is: what kind of story do you want to tell? Your camera is like a lens that lets your audience see you. Choosing the right one is more about the story you want to tell than the camera’s specs.
Do you want a direct, personal feel? Then a modern webcam is perfect. The Razer Kiyo V2, for example, is a powerful software-driven tool. It offers clear 4K video, auto-framing, and HDR for tricky lighting. It’s easy to use and looks professional.
Or do you need something more cinematic? APS-C or full-frame cameras are your best bet. They give you that beautiful, blurry background and unmatched low-light performance. But, they come with a lot of work: changing lenses, focusing manually, and buying a capture card. It’s a big commitment of time and money.
The great equalizer is the green screen. It lets a good webcam create a perfect studio backdrop. On the other hand, a DSLR with a green screen can make you look like you’re in space. It’s amazing how technology can bridge the gap between different tools.
So, your choice sets your limit. A top-notch webcam makes you look sharp and professional. A camera with a green screen makes you look like a pro. It’s the difference between reading the news and making it.
Audio: Dynamic vs Condenser, XLR Interfaces, Mixers
Video is like the flashy frontman of your stream, but audio is the backbone. Get it wrong, and your stream falls apart. Audiences will stick with a bad video before they can’t stand bad audio.
The microphone is key. It’s a debate between dynamic and condenser mics. A dynamic mic is like the Shure SM7B, tough and focused. It’s great for noisy rooms or loud speakers.
A condenser mic is more sensitive, like the ROG Strix Magnus. It captures sound clearly, from soft sounds to keyboard clicks. It’s a hybrid that filters out background noise.
| Feature | Dynamic Microphone | Condenser Microphone |
|---|---|---|
| Best For | Noisy environments, loud sources, close-miking | Quiet studios, detailed vocal capture, multi-instrument recording |
| Background Noise | Excellent rejection | High sensitivity (picks up everything) |
| Power Required | No (usually) | Yes (phantom power via interface) |
| Common Use | Podcasting, live vocals, streaming in shared spaces | Studio vocals, acoustic instruments, ASMR |
To be an audio craftsman, you need an XLR mic. This connector is used in professional audio. It’s strong and sends a balanced signal.
But an XLR mic needs an audio interface. This box translates the analog signal into digital data. The Mackie Mainstream Live Streaming interface is great for this, with clean preamps and level knobs.
An audio interface gives you control. You can adjust levels, add compression, and more. It makes your audio sound professional.
For ultimate control, use a mixer. A mixer is like an audio interface on steroids. It blends multiple sources and lets you produce your stream.
Start with the right mic for your space. Then, get a solid XLR mic and audio interface. Your viewers will appreciate it.
Lighting: Key/Fill/Back and Diffusion
Bad lighting can make your stream look amateurish. Good lighting makes you look professional. It’s what your audience sees first.
Lighting is like magic. It turns a person in a basement into a pro on camera. The key is to master the trio: key, fill, and back lights.
The key light is your main light. It should be at a 45-degree angle to your face. This adds depth and avoids a flat look.
A harsh key light creates dramatic shadows. That’s why you need a fill light. It softens shadows without losing detail.
Put your fill light on the opposite side of the key light. Use a reflector or soft light for this. This balance makes your look natural and three-dimensional.
The back light adds depth. It sits behind you, highlighting your back and shoulders. Without it, you might look like a cutout.
Many streamers make the mistake of using too much light. The solution is diffusion. It softens the light, making it more gentle.
You can use a softbox or a sheer curtain for diffusion. This light wraps around your face, hiding blemishes and reducing glare. It gives you a soft, podcast-like glow.
For a green screen, you need even, diffused light. Uneven light creates shadows and hot spots. This makes your green screen look fuzzy.
Here’s a quick guide to your lighting toolkit:
| Lighting Type | Primary Purpose | Common Tool | Pro Tip |
|---|---|---|---|
| Key Light | Main illumination, defines shape | LED Panel | Place at 45° to subject, brightest source |
| Fill Light | Softens shadows from key light | Softer LED, Reflector | Use at 50% or less intensity of the key |
| Back Light | Creates separation from background | Small LED Bar | Position directly behind and above subject |
| Diffusion | Softens light quality, eliminates harshness | Softbox, Diffusion Sheet | Essential for even green screen lighting |
Good lighting does more than make you visible. It shows respect for your viewers’ eyes. It builds trust and keeps them engaged.
Start with a good key light and a diffuser. Then add your fill and back lights. Your face and analytics will thank you.
Acoustic Treatment for Small Rooms
Ever wonder why professional streamers sound like they’re right next to you? It’s not your microphone. Your room is the real issue. It’s an echo chamber that messes with your audio.
Your mic picks up everything. From the sound of your ‘W’ key to your voice bouncing off walls. Throwing a blanket over your head won’t help. You need acoustic treatment for a better sound.
This isn’t about making your room soundproof. Your neighbors will likely hear you. Acoustic treatment is like interior design for sound. It makes your room sound more intimate and controlled.
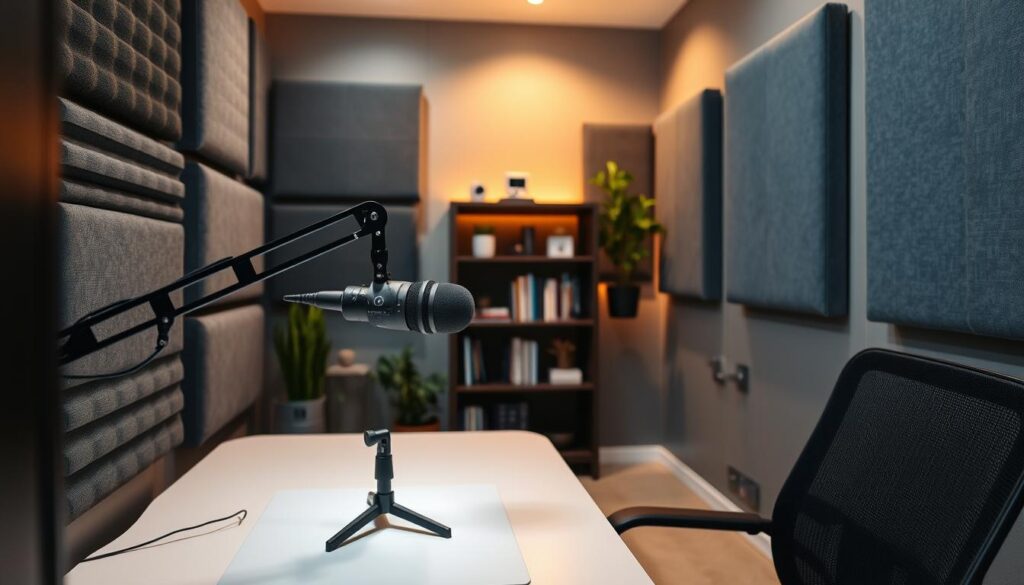
The key to better sound is the acoustic panel. These aren’t just foam squares. They’re tools that soak up sound reflections, making your voice clearer.
Where you place them matters a lot. Focus on corners and first reflection points.
Corners are where low-frequency sounds build up, making your room sound boomy. Bass traps in these areas help control this.
First reflection points are where sound bounces back into your mic. To find them, use a mirror. Hang an acoustic panel there to stop this bounce.
Without treatment, your room makes your voice sound far away. But with it, your voice becomes clear and present. It’s like you’re right in front of your viewers.
You don’t need to cover everything. Start with a few acoustic panels. Two for your side walls, one for the back, and bass traps for corners. This setup will greatly improve your sound.
Ignoring this step is like using a 4K camera with a dirty lens. You’ve got great equipment, but your room is ruining the sound. Proper acoustic panels are essential for professional sound.
Dual-PC vs Single-PC Streaming Architectures
The debate over streaming infrastructure isn’t about politics. It’s about processing power and how much digital chaos you can handle. This choice separates hobbyists from professionals. It’s like choosing between a simple studio apartment and a big home theater complex.
Your choice affects your stream’s reliability, your wallet, and your sanity. It’s a big decision.
The Single-PC setup is simple and cost-effective. Your gaming PC does everything: plays the game, encodes the stream, and handles overlays. It’s like a Swiss Army knife for tech.
But, there’s a catch. Resource contention can be a problem. Your game and OBS might fight over resources, affecting your stream’s quality. This can happen when OBS eats up your CPU during a game.
For many, this is a small price to pay for a simpler life.
The Dual-PC fortress is the opposite. It’s a no-compromise setup. One PC is for gaming, and the other handles encoding and broadcasting. This ensures your stream is always stable.
But, it comes with a cost. It’s more complex and expensive. You need to route your game’s video and microphone’s audio from one PC to the other. This is done with a capture card or software like NDI.
This routing challenge is tough. It turns streaming into a systems integration project. You become a network administrator for your two-computer setup.
| Architecture | Philosophy | Key Advantage | Primary Challenge | Best For |
|---|---|---|---|---|
| Single-PC | Minimalist Efficiency | Simplicity & Lower Cost | Resource Contention (Game vs. Encoder) | Streamers starting out or with top-tier, modern hardware. |
| Dual-PC | Redundant Engineering | Isolated, Rock-Solid Stability | Complex Signal Routing & Higher Cost | Professionals where stream reliability is non-negotiable. |
So, which side are you on? The choice is philosophical. Do you prefer simplicity or do you want to eliminate all risks? Your answer shapes your streaming setup. There’s no one-size-fits-all solution. It depends on your risk tolerance and goals.
Capture Cards and Signal Chains
Your capture card is more than just a piece of hardware. It’s a key player that connects your gaming rig to your streaming software. Without it, your high-quality gameplay would be stuck on one machine, unseen by the world.
Think of it as a middleman. Your gaming PC or console sends out a perfect HDMI signal. The capture card catches this signal, copies it without losing quality, and sends it to OBS on your streaming PC. Its performance is what makes your stream look good.
Not all capture cards are the same. Your first choice is passthrough. Do you need to game on a high-refresh-rate monitor while streaming? A card with a clean passthrough port is essential. It lets the original signal go to your main display, while sending a captured feed to your streaming software.
Then, there’s the resolution battle. Are you aiming for 4K HDR content? You’ll need a capture card that can handle that. Without it, your setup won’t be future-proof.
This leads to the signal chain. Adding a capture card changes things. You’re now dealing with a complex system. Your gaming PC is the main source, and the capture card is the pressure regulator. From there, the system branches out.
Maybe you add a hardware switcher for a dedicated camera feed. Or maybe you route your console through an audio mixer before it hits the card. Each device adds complexity to the system. A cheap HDMI cable or a misconfigured EDID setting can cause problems. Your stream might stutter, desync, or go black.
Building a strong signal chain requires planning. Start with a quality capture card that meets your needs now and has room to grow. Use certified, high-speed cables. Map out your signal path before you start connecting anything. It’s about smart design, not brute force.
To pick the right capture card, here’s a quick guide:
| Type | Key Feature | Ideal For | Passthrough Support | Typical Price Range |
|---|---|---|---|---|
| External USB 3.0 | Plug-and-play portability | Streamers with laptops, console streamers, beginners | Yes, often up to 4K60 | $150 – $300 |
| Internal PCIe | Lowest latency, highest bandwidth | Dedicated streaming PCs, high-bitrate 4K HDR capture | Yes, often with advanced sync features | $250 – $600 |
| USB-C / Thunderbolt | High-speed external bus | Mac users, high-end mobile setups, prosumers | Yes, with high refresh rate support | $200 – $500 |
| Game Console Specific | Simplified setup, console-optimized | Pure console streamers who want minimal fuss | Usually limited to 1080p/60 | $100 – $200 |
The table is more than just specs. It’s a way to find the right fit for your stream. The external USB card is reliable, the internal PCIe card is perfectionistic. Choose the one that matches your stream’s style.
The goal of your signal chain is invisibility. When it works right, your audience won’t even notice it. They’ll just see a flawless stream. Your capture card is key to this illusion. Invest in a good one, wire it well, and you’ll solve many streaming problems before they start.
Desk Layout and Arm Mounts for Mics/Cams
The difference between an amateur setup and a pro broadcast often hangs on an arm. Literally. Your desk layout is your cockpit. You wouldn’t fly a plane with the throttle behind you, so why stream with your mic under your chin?
Ergonomics is the unsung hero of a marathon stream. It’s not about buying the most expensive gear. It’s about placing it intelligently. A cluttered desk leads to a chaotic mind, and your audience can feel that tension.
Enter the microphone boom arm. This simple tool liberates your hands and your sound. Instead of a mic stand hogging precious real estate, a boom arm clamps to your desk and suspends the microphone exactly where you need it.
Take a lightweight champion like the ROG Strix Magnus. At 13 x 9.5 x 5 cm and a mere 355 grams, it’s designed for this exact purpose. It includes a versatile 1/4″ camera mount and a 5/8″ adapter, making it a Swiss Army knife for mounting. You get the mic out of your hand space and into the perfect, consistent position for crisp audio, every time.
The same logic applies to your camera. A wobbly webcam on your monitor is the streaming equivalent of a shaky cam in a horror movie. A sturdy camera arm or quality tripod grants you flattering, repeatable angles without the desk clutter.
This isn’t just about aesthetics. It’s about reducing physical fatigue during a four-hour stream. It’s about creating a frame so professional and repeatable, you can hit “Go Live” without a second thought. Your streaming desk transforms from a work surface into a production studio.
| Mount Type | Primary Use | Key Features | Ideal For |
|---|---|---|---|
| Boom Arm | Microphone Positioning | Articulating joints, desk clamp, cable channels | Dynamic/condenser mics, freeing up desk space |
| Camera Arm | Lens Positioning | Pan/tilt head, counterbalance, various thread sizes | DSLRs, mirrorless cameras, precise framing |
| Heavy-Duty Tripod | Static Camera Placement | Three-point stability, adjustable height, portability | Dedicated camera space, floor-based setups |
| Hybrid Mount (e.g., ROG Strix Magnus) | Multi-Device Support | Lightweight, dual thread adapters (1/4″, 5/8″) | Compact mics, small action cams, accessory mounting |
So, how do you build this command center? Start with the foundation. Your primary monitor should be directly in front of you. Your secondary screens? Angle them slightly. This minimizes neck strain.
Next, deploy your arm mounts strategically. Your microphone boom should swing in from the side, placing the pop filter a few inches from your mouth. Your camera arm should position the lens at or slightly above eye level. This is the “news anchor” angle—it’s authoritative and engaging.
Lastly, think about flow. Your mouse, keyboard, and stream deck should be within a natural, relaxed reach. Every piece of gear has a launchpad. When everything is in its place, you stop thinking about your setup and start thinking about your content. That’s when the magic happens.
OBS Scenes, Overlays, and Hotkeys
The magic of a seamless stream doesn’t happen by accident. It’s engineered in the scenes, overlays, and hotkeys of OBS Studio. This free, open-source application is the silent conductor of your digital broadcast. It’s the difference between a chaotic home video and a polished show.
Let’s break down the ensemble. Scenes are your different camera angles and screen layouts. Think of them as presets for every act of your stream.
- Gameplay Scene: Your main game capture fills the screen.
- Face Cam Scene: A tighter shot for commentary or starting soon screens.
- Intermission Scene: A branded holding screen with music, alerts, or a chat display.
Switching between them manually with a mouse? That’s amateur hour. We’ll fix that.
Overlays are the graphics package that brands your stream. These are the animated borders, subscriber alerts, and lower-third graphics that pop up. Integration is key here. A tool like Razer Synapse for the Kiyo V2 webcam shows how hardware and software can merge, letting you tweak overlay elements tied directly to your gear. Your overlay is your stream’s suit and tie—or its battle armor.
Now, the real power move: hotkeys. This is where you move from reading a script to performing it. Binding scene switches, microphone mutes, and sound effects to keyboard shortcuts turns fumbling into fluency. It makes your stream feel dynamic, responsive, and professional.
Imagine triggering a “BRB” screen, muting your mic during a cough, and playing a victory fanfare—all without your hands leaving the keyboard. That’s control. That’s polish.
| Hotkey Function | Typical Keybind | Stream Impact |
|---|---|---|
| Switch to Gameplay Scene | F13 or Num 1 | Instant, clean transition to main content; avoids dead air. |
| Toggle Microphone Mute | Ctrl+Shift+M | Quickly silence coughs, private conversations, or background noise. |
| Push to Talk (Mic) | Mouse Side Button | Allows for off-mic commentary to teammates without broadcasting it. |
| Trigger Sound Effect | Ctrl+Shift+S | Adds comedic or reactive punctuation (ding, sad trombone). |
| Start/Stop Stream | Ctrl+F12 | The big red button. Reliable and away from common keys. |
Configuring these is your final rehearsal. It turns OBS from a passive recorder into an active performance tool. The software is free, but the fluency you build with these features is what makes a stream worth watching. Stop managing your broadcast and start conducting it.
Cable/Power Management for Stream Gear
Behind every perfect stream is a messy battle against tangled cables. These cables hide behind your monitor, a mess of USB, HDMI, and power cords. While your stream looks great, this hidden mess can ruin your reliability.
This mess isn’t just ugly. It’s also a problem. Swapping a mic? Forget it. USB disconnects? It’s probably a tangled port. Bad power management can cause your lights to dim when your PC GPU starts working.
It’s not just about looking good. It’s about building a strong system. A clean cable run shows you’re ready for upgrades, not just for looks.
For this battle, you need simple, cheap, and effective tools. Say goodbye to zip ties. Say hello to these:
- Velcro Straps (Reusable): The top choice for cable organization. They keep cables together but easy to access.
- Cable Sleeves or Raceways: These turn many wires into one neat bundle. It’s like taming the kraken.
- Powered USB Hub: This is your command center. A good hub keeps your devices powered and saves your PC’s ports.
Your gaming PC and LED panels need a lot of power. Plugging them all into one power strip is risky. It could cause a trip to the breaker box or damage your gear.
Always use a surge protector, not just a power strip. This is essential. For big gear, split your load. PC and monitors on one circuit, lights and audio on another. This keeps your gear stable and interference-free.
Ready to tame the beast? Follow this simple plan:
- Unplug Everything. Start from scratch. It’s the only way.
- Plan Your Run. Map the best path for each device. Keep signal cables away from power cords to avoid problems.
- Connect and Bundle. Plug in each device and secure its cable with velcro. Use bundles for “PC Power,” “Monitor Lines,” and “Audio Bundle.”
- Conceal and Label. Use sleeves or raceways for bundles. Label the ends of cables. Future-you will thank you.
When every plug has its place, and every circuit is happy, your stream will shine. No more fumbling or drops. Just clean, professional streaming from start to finish.
Example Setups (Starter/Pro)
Enough with the abstract concepts. Here’s where we build actual streaming rigs, from indie film to Hollywood blockbuster. Let’s blueprint two concrete paths for your streaming setup.
The starter kit is your gateway drug. It’s the indie film package—lean, mean, and incredibly effective on a budget.
Picture this: a Razer Kiyo V2 webcam handles your face. A USB microphone, like the ROG Strix Magnus, captures your voice cleanly. Two budget LED panels bathe you in light. All of this runs through a single, powerful gaming PC executing OBS like a champ.
This setup proves a powerful truth. You don’t need a second mortgage to start streaming well. It’s accessible, smart, and gets the job done with minimal fuss.
Then, we have the pro rig. This is the blockbuster studio approach. It’s for when you’re ready to produce cinema-grade content from your desk.
The camera upgrades to a Sony A6400, feeding into a clean capture card. Audio gets serious with a Shure SM7B dynamic mic. It runs through a dedicated interface like a Focusrite Scarlett. Lighting evolves into a three-point kit with softboxes for that flawless, shadow-free look.
The brain splits into a dual-PC architecture. One machine games, the other encodes. A hardware stream deck sits on the desk, putting every OBS hotkey at your fingertips.
This isn’t just more gear. It’s about dedicated signal paths and professional-grade control. Every element has a single, optimized job. The result is pristine quality that separates the hobbyist from the full-time creator.
The journey from starter to pro isn’t a leap. It’s a series of smart upgrades. Maybe you start with that single-PC best budget gaming hardware foundation. Then, you add a mixer. Later, you introduce a capture card.
Seeing both blueprints side-by-side demystifies the process. Your path is clear. Start where you are. Build towards where you want to be. Your ultimate streaming setup is waiting.
Troubleshooting Echo, Latency, Desync
When your stream sounds like a bad karaoke night, you’ve got gremlins in the gear. Echo, latency, and desync are the streaming nightmares. They can make even the best setups look amateur. But don’t worry, this is your emergency guide.
Let’s tackle each problem. An echo is usually a simple monitoring issue. Your game audio or voice from speakers gets picked up by your mic. It’s like audio déjà vu. The fix is often easy: use headphones. If you must use speakers, lower their volume and increase your mic’s gain. A good microphone with environmental noise cancellation is even better.
The ASUS ROG Strix Magnus can be a game-changer. Its built-in ENC (Environmental Noise Cancellation) isn’t just marketing. It can cut 30 to 40 decibels of background noise from your audio feed. That’s the difference between a clear voice and one competing with your mechanical keyboard.
Latency is that infuriating delay where your lips move, but the sound arrives a half-second later. It makes you look out of sync with yourself. This ghost is almost always born in software settings. It’s a buffering or encoding issue. Check your audio sync offset in OBS Studio. Look at your audio interface’s buffer size in its control panel. A setting that’s too high creates lag; too low can cause crackles.
Then there’s desync. This is the slow, creeping drift where audio and video gradually part ways, like a poorly dubbed foreign film. This is a timing problem. It often points directly at your capture card or the software chain. Is your capture card receiving a clean signal? Are the frame rates between your gaming PC and streaming PC mismatched?
The first and most critical step for any of these issues is isolation. Test each piece of your setup alone. Bypass the capture card. Test the microphone directly into your computer. Use a different USB port. This process of elimination will often spotlight the single faulty component.
Most battles are won in software. OBS is a powerful tool, but its audio and video settings are a labyrinth. Your audio drivers are another common culprit. An outdated or corrupted driver can introduce all three of these problems. Keep them updated.
| Symptom | Most Likely Cause | Primary Fix | Software Setting to Check First |
|---|---|---|---|
| Echo / Reverb | Speaker audio feeding into microphone. | Switch to headphones; enable hardware ENC. | Mic gain level; noise suppression filter in OBS. |
| Audio Latency (Delay) | High audio buffer size or misaligned sync offset. | Lower buffer size in audio interface settings. | OBS Audio Sync Offset (Advanced Audio Properties). |
| Audio-Video Desync (Drift) | Capture card timing issue or frame rate mismatch. | Ensure matching FPS (e.g., 60 in game, 60 in capture). | OBS Video Settings (Canvas/Output FPS); capture card software. |
Remember, a tool like the ROG Strix Magnus tackles the noise part of the equation. It can’t fix a software timing bug or a misconfigured buffer. For that, you need to put on your detective hat. Check those settings. Isolate the signal chain. The solution is almost always in front of you, hidden in a dropdown menu or a checkbox you’ve ignored.
Streaming is a live performance. There’s no post-production to save you. When echo, latency, or desync strikes, systematic troubleshooting is your only way back. Start simple. Is it the hardware or the software? Is it the source or the capture? Answer those questions, and you’ll silence the gremlins every time.
Scalability for Upgrades
Scalability is key to avoiding buyer’s remorse in content creation. Your needs will evolve. You might start solo but soon want a guest mic. Or, you might stream at 1080p now but dream of 4K later.
A smart setup is dynamic, not static. It’s like a city plan, ready for growth and new features.
Think modularly. Your first purchase should be a puzzle piece, not the whole picture. Look at each component for its future possibilities, not just its current use.
Consider your audio interface. A model with just one XLR input is limiting. Choose one with four or more inputs for flexibility. This allows for a dynamic mic, a condenser, and more.
For your capture card, aim for 4K passthrough or high-refresh-rate signals. This isn’t about using all bandwidth today. It’s about growing into it, ensuring your setup never holds you back.
Your physical space is also key. A cluttered desk with no room for upgrades is a dead end. Plan your desk and cable management for expansion.
Choose ecosystems that scale. Use systems like Philips Hue or ASUS Aura Sync for easy lighting upgrades. This modular approach works for software too, with plugins and tools that grow with you.
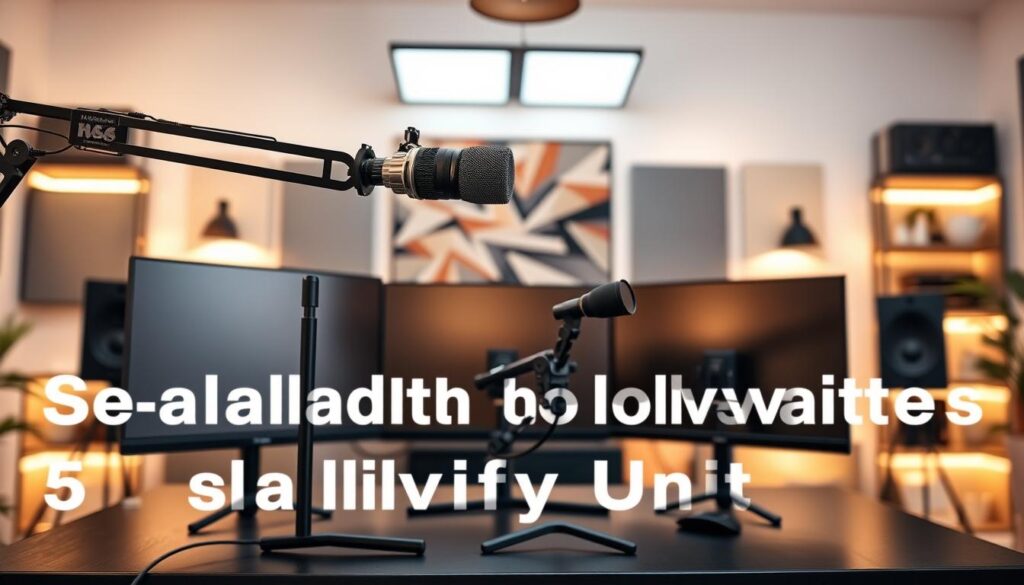
Scalability and modularity offer a world of difference. It’s like building with LEGO versus carving from marble.
| Strategic Focus | Modular Mindset (The City Planner) | Monolithic Mindset (The Sculptor) |
|---|---|---|
| Primary Goal | Future-proofing you and your workflow. | Solving only today’s problem. |
| Gear Selection | Chooses components with extra inputs, bandwidth, and physical space. | Buys the cheapest or simplest option that meets immediate needs. |
| Upgrade Cost | Lower long-term cost; new gear integrates with existing foundation. | Higher long-term cost; often requires a full system replacement. |
| Flexibility | High. Easily adapts to new trends, formats, or collaborative projects. | Low. Major changes require a complete teardown and rebuild. |
Building for scalability shows confidence in your growth. It’s not just assembling a setup; it’s creating a flexible grid for your future. Your first piece should be a cornerstone.
Conclusion
So, after looking at everything from sensor sizes to signal chains, what’s the final say on your streaming setup? Creating a streaming-ready battle station is a personal journey. It’s like combining engineering and art.
Your choice between APS-C cameras and XLR mics sets your sound and look. Acoustic treatment helps control room echo. And, strategic lighting shapes how you appear on screen.
Your OBS scenes and capture cards are the digital heart of your setup. There’s no one-size-fits-all solution. The best setup changes as you grow.
Start with one key piece, like a great mic or a proper light. Learn to use it well. Then, add more parts gradually. This way, you avoid feeling overwhelmed, especially as your setup expands to support tools like multiplayer game hosting solutions that enhance collaborative and online experiences.
Keeping cables organized helps avoid mess. Learning to fix echo or desync issues quickly is important. Planning for future upgrades means your station can grow with you.
Your battle station is not just a setup. It’s a dynamic system. Soon, you’ll have a command center that doesn’t just stream games — it creates entire worlds.