
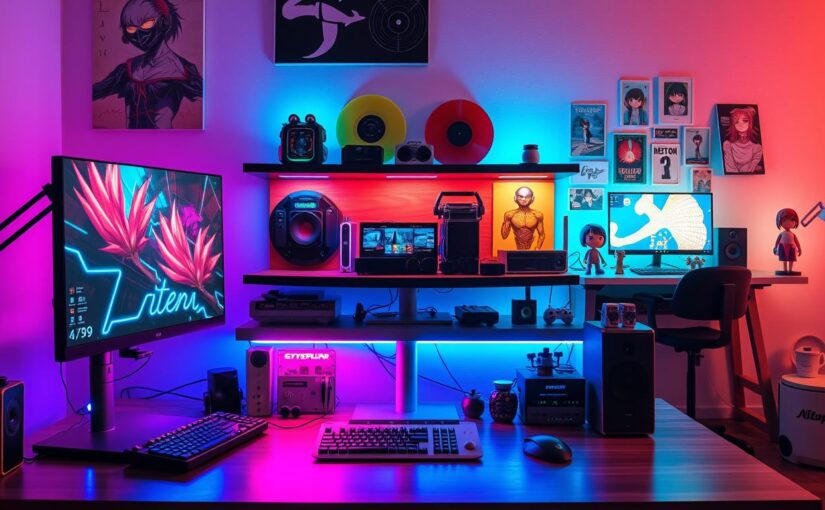
A generic black box under your desk is as exciting as a tax return. We build with purpose, just like a striking piece of art catches your eye.
The first time I saw Cyberpunk 2020’s rulebook, it blew my mind. It wasn’t just a game manual. Its black and red color palette and graphic novel artwork opened a portal. This visual cohesion didn’t just explain rules—it created a world.
A cohesive theme changes your battle station into a story piece. It’s like the difference between reading a spreadsheet and diving into a graphic novel.
A well-executed theme is like a mental framework. It sets your mood before you start gaming. It’s not just about looks. It’s about telling a story that makes your experience better.
Your chosen palette and aesthetic are your guide. For more on creating a cohesive theme, check out this guide on crafting a cohesive theme. My journey into Night City shows that a theme doesn’t just look good. It makes you feel something.
Picking a Cohesive Palette and Materials
Think of your build’s color palette as the start of a movie. You’re the director. Do you want a dark, rainy scene like in Ghost in the Shell, or a warm, old-school VHS glow? Your choice sets the tone for everything.
Choosing colors isn’t just about picking colors. It’s about capturing the mood of a genre. For cyberpunk, it’s not just one color. It’s a mix of black and red for corporate towers, with neon lights adding a pop of color.
Your inspiration is your guide. Look at Cyberpunk: Edgerunners. Its look is defined by a neon-dystopian-futuristic setting. The main color is a dark blue-black sky. The bright colors come from holographic ads.
Find a main color and a bright accent. For synthwave, use deep purple for the base and magenta for the accent. For a mecha hangar, use industrial grunge colors with yellow stripes.
Turn colors into materials. This makes your build feel real. A corporate dystopia needs heavy, cold materials like matte black aluminum. A clean future theme uses glossy white acrylic.
Think about what your theme feels like. Do you want it to be rough or smooth? Your material choice is as important as your color palettes.
Here’s a quick breakdown for common themes:
- Cyberpunk Noir: Dominant: Matte Black. Accent: Blood Red or Toxic Green neon. Material: Brushed aluminum, textured plastic.
- Retro-Future: Dominant: Beige/Cream. Accent: CRT Green or Orange. Material: Retro plastic, light acrylic.
- Mecha Industrial: Dominant: Gunmetal Grey. Accent: Warning Yellow. Material: Powder-coated steel, rubberized details.
Every choice matters. Glossy surfaces say “new” and “high-tech.” Matte finishes say “used” and “functional.” That neon RGB isn’t just lighting; it’s a story element.
Before shopping, watch a scene. Pause it. Take its essence. Your perfect color palettes and materials are waiting for you.
Sourcing Themed Parts: Keycaps, Desk Mats, Panels, Sleeves
Forget Amazon’s quick delivery. Creating a themed build is a slow journey through online markets. It’s like crafting your character’s gear from scratch in a tabletop RPG. Each piece of gear has its own story.
Your first piece of loot? Keycaps. Anyone can buy a basic keyboard. But a true enthusiast searches for unique sets, like those from Serial Experiments Lain or Star Wars. These keycaps are tiny sculptures, often hand-painted.
Patience is key here. Group buys take months, not days. You wait for production and hope it meets your expectations. The aftermarket offers high prices but unique keyboards.
Next, set the stage. A desk mat is more than a mousepad. Imagine one that looks like the Sprawl from Neuromancer or a motherboard. It ties your desk to the theme.
Then, consider your case. Ditch the plain glass for a custom panel. Custom decals can turn it into art. Choose designs like city skylines or geometric patterns.
Don’t forget the small details. A matching cable sleeve or a GPU support shaped like a mecha’s arm adds to the theme. Each item should feel chosen with care.
So, where do you shop? Be careful.
- Reputable Vendors: Choose known community favorites for keycaps and mats. Check reviews on enthusiast subreddits.
- The Group Buy Gauntlet: Use proxies like Drop or join directly on vendor sites. Know the risks and delays.
- Avoiding Knockoffs: Cheap, off-theme parts are a giveaway. If it’s too cheap, it’s likely a scam. Poorly printed custom decals and thin desk mats are signs of low quality.
The journey is the goal. It’s about creating a story, not just a PC. When you finish, your rig is more than hardware. It’s a carefully crafted piece of art.
Lighting and Decals for Visual Consistency
Forget ‘rainbow puke.’ Smart lighting makes a cityscape like Blade Runner‘s Los Angeles. It’s the heart of your theme, bringing life to plastic and metal. If you mess up, your build is just a fancy box. But if you get it right, you’ve created a mood.
We’re moving past the usual color cycle. Think like a movie director. Cyberpunk anime’s colors are not just bright; they’re chosen for a reason. That electric glow in a club scene? That’s a specific neon feel, not just random lights. Your lighting software is like a paintbrush, creating gradients that mimic a flickering sign or a cold, static blue.
This careful planning makes the fantasy believable. A warm, pulsing orange can feel like a reactor core. A slow, rolling purple wave can evoke deep space. The goal is to make every light support the story.
| Theme Vibe | Lighting Profile | Key Color & Effect | Software Tip |
|---|---|---|---|
| Cyberpunk Alley | Dynamic, uneven glow | Deep magenta & electric cyan gradients | Use a “wave” effect with randomized speed for a chaotic sign feel. |
| Clean Lab / Sci-Fi | Static, clinical illumination | Pure white or cold, steely blue | Set a single, solid color. Brightness at 60-70% to avoid harshness. |
| Neo-Retro Arcade | Localized, bright points | Primary red, blue, yellow on black | Assign specific keys or strips to single colors, avoiding blends. |
| Anime Mecha Core | Pulsing “active” state | Green or orange with a slow breath effect | Sync the breath effect to PC activity or audio for a living machine feel. |
Then come the custom decals—the tattoos of your case. A well-placed, high-quality vinyl decal can do more for authenticity than a $500 component. Think the Arasaka logo from Cyberpunk 2077 or a subtle Akira pill motif. This isn’t about slapping on stickers. It’s about strategic branding.
Placement is key. A decal centered on a side panel feels official, like a manufacturer badge. One placed asymmetrically near a vent or corner feels weathered, like street art. Always mock up the placement with painter’s tape first. Scaling matters too; a giant logo can look cheap, while a small, precise one feels like an Easter egg for the observant.
The real magic happens when you combine lighting with your custom decals. A backlit decal on tinted glass creates stunning depth. Use a cold white light behind a corporate logo decal to make it feel sterile and imposing. A soft neon pink glow behind a geometric pattern can make it float in mid-air. This turns your side panel into a diorama, not a sticker book.
Consider the material of the decal itself. A matte finish absorbs light, feeling grounded. A gloss or holographic finish catches and refracts your RGB, adding a layer of chaotic sparkle perfect for certain neon-drenched themes. The interaction between light and surface is your final, masterful touch.
So, before you set everything to rainbow, ask yourself: what’s the weather like in your digital world? Is it a rainy neon night, or a sterile dawn? Your lighting and custom decals are the answers. They’re the cheapest, highest-impact tools you have to stop showing parts and start showing a vision.
Case Mods and Printed Accessories
Welcome to the advanced dojo of PC building, where your case transforms from a mere box into the central artifact of your theme. This is the realm of the true modder. If earlier steps were about curation, case mods are about creation. They are the cybernetic enhancements of the PC world. Are you just chrome, or are you chromed up?
We’re talking about moving from assembly to architecture. Your case is no longer a container. It becomes a sculptural element, a physical manifesto of your chosen aesthetic. This is where vision meets vinyl cutter, where concept meets CNC.
Let’s break down the practical playground. Imagine CNC-milled aluminum grilles with geometric patterns inspired by mecha venting or art deco filigree. They replace bland, stamped metal, giving unparalleled airflow and a bespoke look. Then there are 3D-printed shrouds and brackets. These plastic heroes hide unsightly power supplies, manage cable chaos, or create custom reservoirs for liquid cooling loops. They turn functional eyesores into designed features.
The pinnacle for many? Acrylic and polycarbonate integrations. By carefully cutting and bonding transparent panels, you can create the illusion of a floating interior or build layered “sandwich” cases that look like they’re from a sci-fi prop department. The light dances differently here.
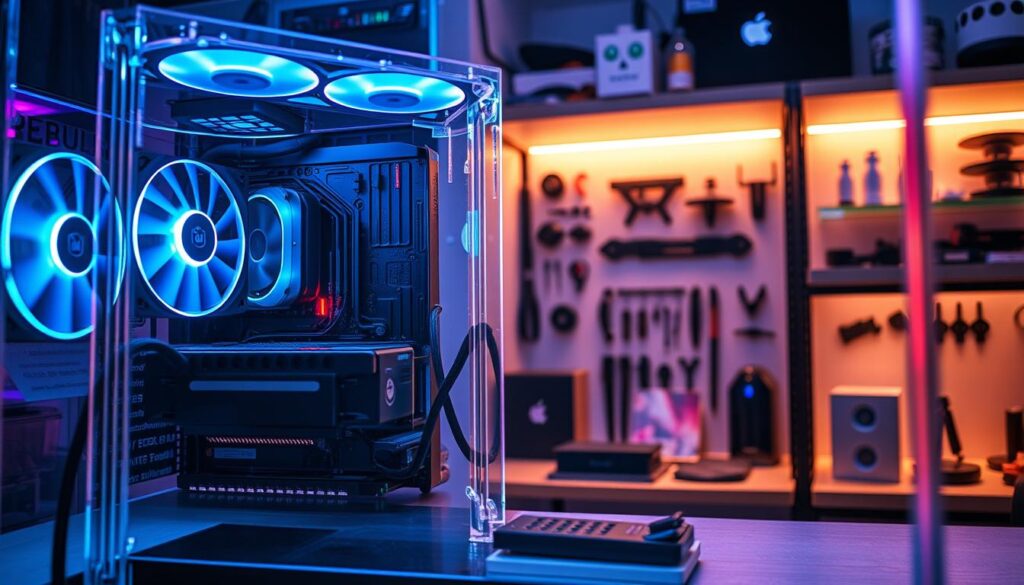
Tools are your new best friends and worst critics. A Dremel is the gateway drug. A 3D printer is a factory in your closet. For the serious, a small CNC router or an acrylic bender enters the chat. Each tool has a tolerance for error. With a Dremel, that tolerance is measured in millimeters and prayers. With a CNC file, it’s measured in microns.
This leads to the modder’s eternal question: when is a mistake a “feature” and when is it a “bug”? A slightly uneven cut can be framed as “artisanal texture.” A paint drip might become “intentional weathering” for a post-apocalyptic theme. The line is blurry, and that’s part of the fun. It’s about controlled chaos.
Choosing your path in case mods depends on your tools, patience, and desired outcome. The table below isn’t a ranking, but a roadmap.
| Mod Type | Primary Tools | Skill Floor | Visual Impact |
|---|---|---|---|
| CNC Milling | CNC Machine, CAD Software | High (Precision & Tech) | Ultra-Clean, Industrial |
| 3D Printing | 3D Printer, Slicer Software | Medium (Design & Patience) | Highly Custom, Organic Shapes |
| Acrylic Fabrication | Acrylic Bender, Laser Cutter | Medium-High (Heat Control) | Modern, Translucent, “Floating” |
| Custom Paint & Etching | Airbrush, Vinyl Cutter, Sandblaster | Low-Medium (Artistic Eye) | Total Surface Transformation |
So, you start with a concept sketch. You learn the tools. You make a thousand tiny decisions. And slowly, the off-the-shelf case disappears. What remains is something uniquely yours. It’s not just a PC anymore. It’s a statement piece that happens to compute. That’s the power of moving from consumer to creator, from putting parts in a box to redefining the box itself.
Iconic Examples: Cyberpunk, Neo-Retro, Anime Mecha
Forget vague inspiration; true thematic mastery comes from studying concrete archetypes like Cyberpunk’s grime, Neo-Retro’s nostalgia, and Mecha’s precision. These aren’t just styles—they’re full sensory blueprints with their own rules of color, material, and light. Let’s autopsy what makes them tick.
What defines the Cyberpunk aesthetic? It’s the visual tension between hope and decay. Think oppressive vertical cityscapes, where vibrant neon signs bleed into rain-slicked asphalt. The color theory is brutal: electric magentas and cyans violently punctuate fields of gunmetal gray and industrial black.
Material finishes celebrate the guts of the machine. Exposed wiring isn’t a flaw; it’s a fashion statement, echoing the chaotic energy of Cyberpunk: Edgerunners. Lighting is vertical, harsh, and casts long shadows—a philosophy borrowed directly from the philosophical sheen of Ghost in the Shell. Your build should feel like it’s powered by a stolen corporate data chip.
Now, shift gears to a future that never was. Neo-Retro doesn’t just look old; it looks like the past’s dream of tomorrow. This is the realm of retro CRT aesthetics. Imagine the soft, green glow of a terminal, the comforting beige of aged plastic, and the gentle curve of a monitor housing.
The palette is subdued: soft teals, warm ambers, and matte beige. It’s the color of the Alien movie’s computer UI or the trusty Pip-Boy from Fallout. Materials feel tactile—brushed aluminum, matte plastics, and rubberized textures. Lighting is diffuse and warm, never blinding. It’s a comforting, almost nostalgic, tech.
For surgical cleanliness and implied power, enter Anime Mecha. This aesthetic is angular, purposeful, and loaded with intent. Picture the hangars of Gundam or the Evangelion cages in Neon Genesis. Color theory uses bold, primary blocks—royal blues, stark whites, and vivid reds—often separated by sharp hazard stripes.
Finishes are pristine: high-gloss coatings, anodized aluminum, and perfectly fitted panels. Lighting is clinical and precise, often using cool white or blue LEDs to highlight vernier thruster details. The goal is a machine that looks ready to launch into combat at a moment’s notice.
| Theme | Color Palette | Material Finish | Lighting Philosophy | Iconic Reference |
|---|---|---|---|---|
| Cyberpunk | Neon magenta, cyan, gunmetal gray | Exposed wiring, brushed steel, grime textures | Oppressive vertical streaks, high contrast | Ghost in the Shell cityscapes |
| Neo-Retro | Soft teal, amber, beige, CRT green | Matte plastic, brushed aluminum, rubber | Diffuse, warm, low-glare ambient | Fallout Pip-Boy; retro CRT aesthetics |
| Anime Mecha | Royal blue, stark white, red, hazard yellow | High-gloss coating, anodized metal, clean panels | Clinical, precise, cool-white accents | Gundam hangar maintenance bays |
So, which blueprint speaks to you? The chaotic energy of Cyberpunk, the comforting nostalgia of Neo-Retro, or the militant precision of Anime Mecha? Each offers a complete design language. Your job is to pick the dialect and speak it fluently through every keycap, LED, and panel mod.
Budget vs Premium Theme Execution
Building a themed PC doesn’t need a lot of money. It just takes a good plan. The first excitement can quickly turn into sticker shock. But, the journey to loving your PC is more about smart spending than the total cost.
A premium build is like high-end fashion for PCs. It includes custom water loops, hand-wired peripherals, and case mods done by experts. The look is perfect, but it comes with a high price tag. On the other hand, a budget build is like streetwear. It uses smart tricks like spray paint and decals to look great without spending a lot. A standout item, like amazing keycaps, is the main focus.
The main difference is in the details and finish. A $50 vinyl wrap can change a case’s look, while a $500 powder coat makes it last longer. Generic RGB lights add color, but custom LED arrays offer more control. The goal is to find the keystone items that make your theme stand out. You can save money without losing the theme’s essence.
Your theme’s ambassador is your keystone. For a cyberpunk theme, it might be neon keycaps. For steampunk, it could be a brass pump res. Spend on these key items. Then, use smart budget tricks for the rest. A hand-painted panel can be your masterpiece, while decals save money.
The table below shows how to spend wisely. It’s your guide to making your budget go further.
| Aspect | Budget Execution | Premium Execution | Theme Impact Verdict |
|---|---|---|---|
| Case Finish | High-quality vinyl wrap, selective spray painting | Professional powder coating, custom CNC machining | High (Foundation is key, but a clean budget finish often suffices) |
| Lighting | Generic RGB strips/fans, single-zone control | Addressable LED arrays, software-controlled per-LED effects | Medium-High (Smart placement of basic RGB can be very effective) |
| Keycaps & Peripherals | Themed keycap set as centerpiece, stock keyboard | Fully custom hand-wired board, painted/debossed mouse | Very High (This is a prime keystone item—never cheap out here) |
| Decals & Art | Pre-cut vinyl decals, custom printed desk mat | Airbrushed artwork, etched glass or metal panels | Medium (Decals are a high-impact, low-cost win) |
| Cooling Aesthetics | Stock coolers with added vinyl, colored coolant in AIO | Full custom loop with hard tubing, dyed coolant, themed fittings | Low-Medium (Unless it’s a showcase window, this is a corner to cut) |
Choosing between budget and premium isn’t always easy. The best builds often mix both. Spend on the key items that define your theme, like keycaps or case mods. Be smart with the rest. Your theme’s true value comes from thoughtful choices, not just money.
Maintenance and Color Fade Concerns
Your themed rig is like a museum piece. Without care, its color palettes will fade. This isn’t just dust and UV damage. It’s a slow fade.
RGB LEDs can change from cool white to yellow over time. Vinyl decals can peel or get a tan. Painted surfaces, like neon accents, can bleach from UV rays.
Your art needs a plan to stay bright. Here’s a list of common problems and how to fight them.
| Themed Component | Primary Degradation Risk | Visual Impact | Proactive Defense |
|---|---|---|---|
| RGB LED Strips | Color temperature shift (white to yellow) | Inconsistent lighting, ruins cool/warm tone balance | Use brand-name LEDs with higher CRI ratings; limit max brightness when possible. |
| Vinyl Decals & Wraps | Yellowing, peeling at edges | Muddies colors, creates distracting texture | Invest in higher-grade automotive wrap vinyl; apply a UV-protective clear coat. |
| Painted Surfaces (Especially Neon) | UV-induced color fade | Dulls vibrant accents, creates patchy appearance | Always finish with a matte or gloss clear coat containing UV inhibitors. |
| Custom Printed Acrylic/Panels | Scratches, dust adhesion | Obscures detailed artwork, looks perpetually dirty | Use anti-static screen cleaners; consider a removable protective film. |
| Keycaps & Desk Mats | Oils, dust, general grime buildup | Mutes colors, creates a dingy, worn feel | Establish a regular cleaning schedule with appropriate, gentle solvents. |
To keep your diorama looking new, start with the air. Positive air pressure inside your case keeps dust out. Use fine-mesh dust filters on fans too.
Choose the right vinyl for surfaces. Cheap stuff yellows fast. Automotive-grade vinyl resists sun and heat. For painted mods, a UV-protective clear coat is essential.
This isn’t just about cleaning. It’s about keeping your masterpiece looking fresh. Avoid letting your build look old before its time. Keep the dystopia on the screen, not on your desk.
Sound Design to Match the Theme
The hum of a city, the whir of a reactor, the click of a data-port—sound design is key for your themed desk setup. We focus on RGB patterns and custom keycaps, but what does your build sound like? If your cyberpunk rig looks like Neo-Tokyo but sounds like a printer, it’s not immersive.
Think of the music in a club scene. It’s not just background noise; it defines the environment. Your desk’s audio should do the same.
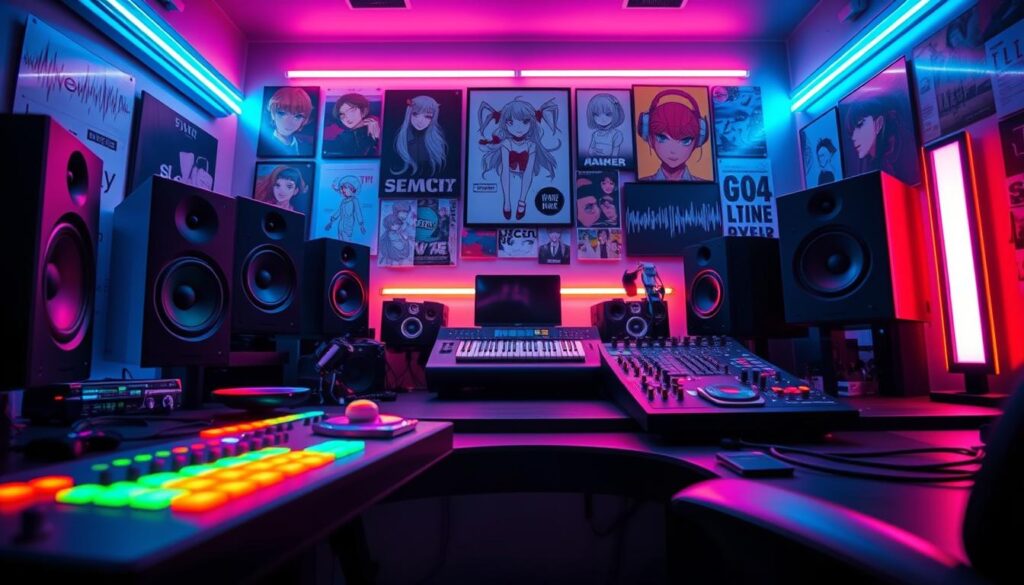
Start with software, an easy win. Your operating system is a canvas for sound branding. Create custom audio profiles. Map system alerts to short, thematic sounds.
A Windows startup chime could be a retro arcade coin drop. A file deletion sound? Make it the satisfying *snick* of a blade closing.
This is about subtlety. You’re scoring the daily drama of your digital life.
Now, the hardware. This is where your themed desk setup finds its voice. Your cooling fans are key. Choose them based on sound, not just CFM and static pressure.
A cyberpunk theme needs a deep, resonant fan curve. You want the hum of a city, not a turbine screech. Pair it with tactile keyboard switches for a sharp, precise sound.
For a retro build, focus on tactile hardware. Use a physical, clicky switch for the power button. That *CLUNK* is pure nostalgia. Quiet, low-RPM fans mimic an old CRT monitor’s gentle whir.
And for anime mecha fans? Your cooling solution should sound like a reactor coming online. Choose fans with a smooth, powerful ramp-up. The sound should promise performance, not annoyance.
| Fan Model | Acoustic Profile (dB/A) | Thematic Fit | Key Note |
|---|---|---|---|
| Noctua NF-A12x25 | ~22.6 dB | Retro / Quiet Library | Exceptionally low hum, smooth. The “silent butler” of fans. |
| Lian Li UNI FAN SL-INF | ~28 dB (under load) | Cyberpunk / Modern City | Deep rotor hum, visually syncs with RGB for that tech-core vibe. |
| Arctic P12 PWM PST | ~30 dB (max) | Budget Mecha / Industrial | Has a distinct, purposeful whir that suggests machinery at work. |
| be quiet! Silent Wings 4 | ~16.5 dB | Minimalist / Professional | Nearly inaudible. For themes where sound is an absence, not a presence. |
The table above isn’t just a specs list. It’s a casting call for your build’s soundtrack. Choosing the right “actor” for the acoustic role is as important as picking the right color for your case.
Don’t forget the peripherals. A mouse with silent clicks is key for stealth themes. A mechanical keyboard with clicky switches is essential for retro typing simulations. Every component adds to the sound.
When done right, sound design transforms your desk into a living environment. You’re not just building a PC. You’re creating a mood, an atmosphere, a tiny world with its own sound. And that’s the kind of detail that makes a setup legendary.
Photo/Video Tips to Showcase
When you document a themed build, it’s not just about taking pictures. It’s about creating a mini movie. You’ve built a story; now you need to capture it. This is where you become a director.
Don’t use the usual phone shot. That’s for online sales. Your themed desk setup needs a special photo. Think of your build as a character, not just a thing. How would a movie introduce this character?
Learn to use the shallow depth of field. It makes your photos look like art, not just items. Use a wide aperture to make your main parts stand out while the background fades away. This focuses the viewer’s attention on your key details.
Lighting sets the mood. Your RGB scheme inside should match your external lights. Use colored gels over lights to enhance your theme. For example, a cyan gel can make your build look like it’s bathed in light.
Staging is key. A prop is not just clutter; it tells a story. Place items together to show your build’s world. For example, a vintage cassette next to a modern board tells a story of contrasts.
For videos, aim for short, smooth scenes. A slow pan or a focus shift can be mesmerizing. The goal is to share a moment that feels like a mini-movie.
| Gear Tier | Essential Equipment | Best For | Pro Tip |
|---|---|---|---|
| Basic | Smartphone with Portrait mode, natural window light, simple backdrop | Clean, well-lit static shots focusing on color and form. | Use the “rule of thirds” grid on your phone. Don’t center everything. |
| Enthuasiast | DSLR/mirrorless camera (50mm lens), single LED panel, small tripod | Controlling depth of field and introducing deliberate shadows. | Bounce your LED light off a white wall for softer, more diffused illumination. |
| Pro Setup | Full-frame camera, macro lens, multiple RGB lights, lightbox for detail shots | Cinematic video loops and extreme close-ups of texture and finish. | Use a CPL filter to kill reflections on glossy keycaps and monitor bezels. |
Your last shot is your project’s main point. It’s not just proof of building; it’s proof of your vision. When someone sees it, they should feel like they’re in a special place. That’s the final step. You’re not just building; you’re curating a tiny, perfect show.
Parts Lists for Three Complete Themes
Theory is for philosophers; execution is for keyboard warriors. Let’s move from talking about looks to actually getting the parts for three themed desk setups. These lists are your blueprints. Each one picks out components, color palettes, and mods for a specific look, from a dystopian alley to a forgotten arcade.
This build is all about high-tech meets low-life. Start with a blacked-out mid-tower case. The key accents are sharp red (#FF0000) or fluorescent magenta (#FF00FF) on cable sleeves and custom water-cooling loops. Keycaps should have Japanese sub-legends in dark gray with red or magenta highlights. Your desk mat should look like a neon-lit alley scene, wet with virtual rain. The final touch? Custom decals of corporate logos or Kanji graffiti on the side panel. It’s like a dystopian advertisement.
Synthwave Sentinel (Neo-Retro)
This theme looks back to a past that never was. The base is a beige or off-white case. The standout case mod is a faux-CRT display on the side panel, showing retro waveforms. Use pastel purple (#B19CD9) and blue (#87CEEB) LED strips for lighting, avoiding pure white. For keycaps, choose high-profile SA style in retro beige and gray. The ultimate touch? A dust cover that looks like a weathered flight case. It’s the peak of retro CRT aesthetics and modern tech.
Armored Core (Anime Mecha)
This build is inspired by Ghost in the Shell and mecha anime. It’s functional art. Use a gunmetal gray or silver case as the base. Add angular, 3D-printed armor panels in matte black. Keycaps should be in a militaristic palette: dark gray (HEX #2F4F4F) and white, with subtle yellow accents. Use yellow hazard-striped cable combs for wiring. The desk mat should have technical schematics or a weathered military grid. Custom decals of warning labels or unit insignias finish the look.
| Theme | Core Color Palette (HEX) | Signature Mod | Vibe / Aesthetic Reference |
|---|---|---|---|
| Neon-Night City | #000000, #FF0000, #FF00FF | Fluorescent Coolant & Kanji Keycaps | Blade Runner alleyways; intense neon saturation |
| Synthwave Sentinel | #F5F5DC, #B19CD9, #87CEEB | Faux-CRT Side Panel Display | 1980s dreamscape; driving into a digital sunset (retro CRT aesthetics) |
| Armored Core | #2F4F4F, #FFFFFF, #FFD700 | 3D-Printed Angular Armor Panels | Anime mecha hangar; utilitarian and battle-ready |
These lists are more than just shopping guides. They’re arguments. Each part, from keycaps to case mods, is a sentence in a visual essay. Now, you have the words to write it.
Community Submission Guidelines
Think your rig could pass inspection in the halls of the Ghost in the Shell universe? We’re opening the gates to our digital arcade. Your build isn’t just parts; it’s a story. We want to dive into that story.
We aim to create a gallery of inspired builds. It’s like a curated feed where each build tells a tale. But we need your help to fill it. Here’s how to submit your masterpiece for a feature.
First, the narrative is non-negotiable. Don’t just send photos. Send us the story. What inspired you? Was it a film, game, or architectural movement? How do each part, from keycaps to case mods, fit into your vision? Coherence is key.
Second, visual proof must be impeccable. Check out Section 10 for photo tips. We can’t accept blurry shots lit by a single bulb. We need clear, high-resolution images that show off your custom decals and paintwork. Show us your build from different angles.
To make things easier, include this data packet with your submission:
- Full Parts List: List the make, model, and source of key themed items.
- Inspiration Sources: What media, art, or concepts inspired your build?
- Unique Mods Documented: What did you create, paint, or program yourself?
- High-Res Image Gallery: A link to a cloud folder (Google Drive, Dropbox) is best.
The legal part is simple but important. By submitting, you confirm you own the images and can share them. You’re giving us permission to feature them. We celebrate your work, including any unique custom decals or designs.
Ready to upload? Send your complete submission package to our submissions portal. Our editors are always looking for the next great build. Your rig could be the next feature in our digital arcade. The mainframe is waiting.
Conclusion
Building a themed setup is all about passion. You take a genre you love and turn its look into a working machine. It’s more than just gaming; it’s creating an experience that speaks to you, especially when paired with reliable multiplayer game hosting solutions that support seamless shared gameplay.
That iconic look needs a strong heart. A smart build balances beauty with practical value. Choose parts that can grow with you. AMD’s AM5 platform is a long-term choice, while Intel’s socket might change soon.
Your GPU and monitor are key to performance. In 2025, 1080p is great for fast frames without spending too much. A 1440p display with high refresh rates is a good investment for your eyes. Don’t spend too much on peripherals.
The final system should grow with you. Future-proofing is important. It makes your setup a living project. For more on this, check out the smart build philosophy that values both performance and longevity. Now, go create something iconic and lasting.